
Exploring the Strapi Admin Panel (with Screenshots) & Strapi AI Feature
Before we start exploring the Strapi admin panel, we first want to apprehend what Strapi is an open source headless CMS constructed on Node.Js. Made with. It offers you a easy, present day and easy-to-use interface to create content material sorts, manipulate content material, add media and robotically generate REST/GraphQL APIs. You can use that API with any interface (React, Next.Js, Vue, cellular apps, static web sites, and so on).
Let’s start exploring the Strapi admin panel using the Strapi AI feature:
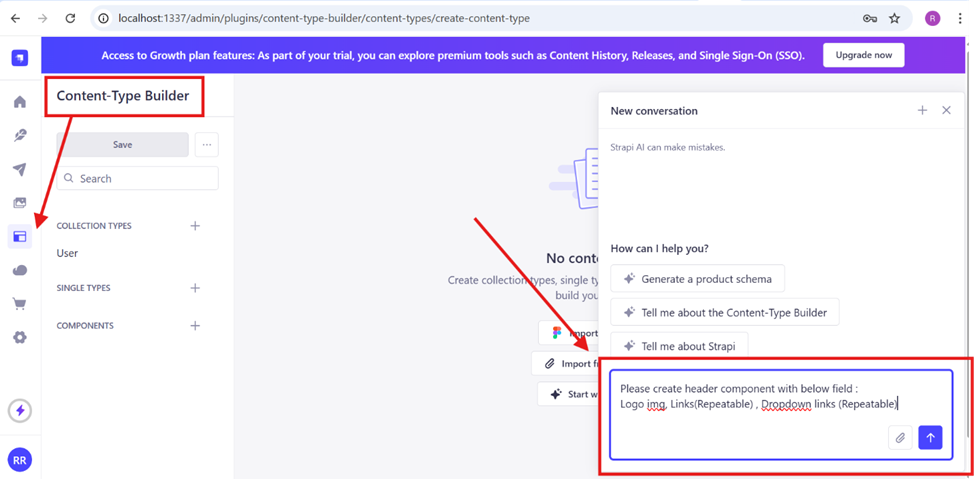
Content Type Builder: Any component or page starts with a content type builder. Before we can add content to a field, we must first create the field.The good news is that Strapi introduced Strapi AI, and with this AI feature, you can create a full component without manually selecting fields—just add a prompt in the Strapi open chat. Please see the attached screenshot where I created a Header component using only a prompt.
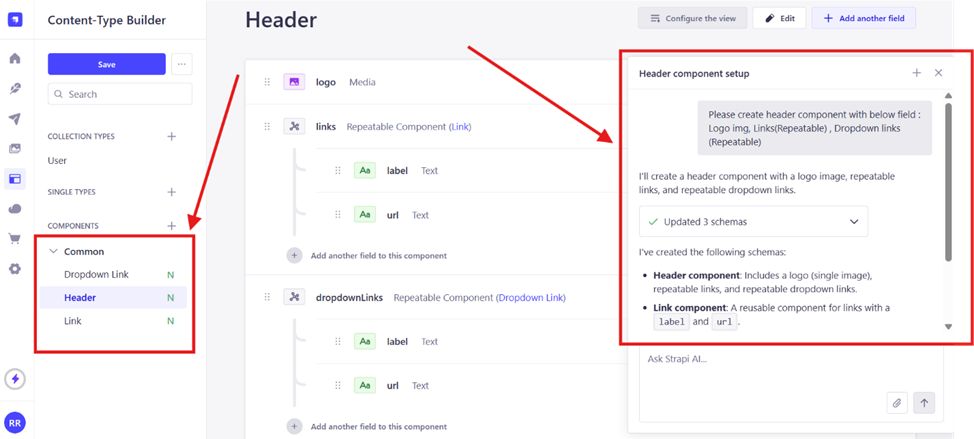
In the second screenshot below, you can see the Header component created by Strapi AI. There is no need to manually select fields. After that, click the Save button and it will restart automatically and your component saved.
Note: You cannot add content directly to the component. After creating a component, you need to add that component to a Collection Type or Single Type. Only then will you be able to add content to the component and pages.
Collection Type: Blogs, case studies, service details, header, footer, etc. (All multiple pages with the same components)
Single Type: Home, About Us, Contact Us, etc. (All single pages with different components)
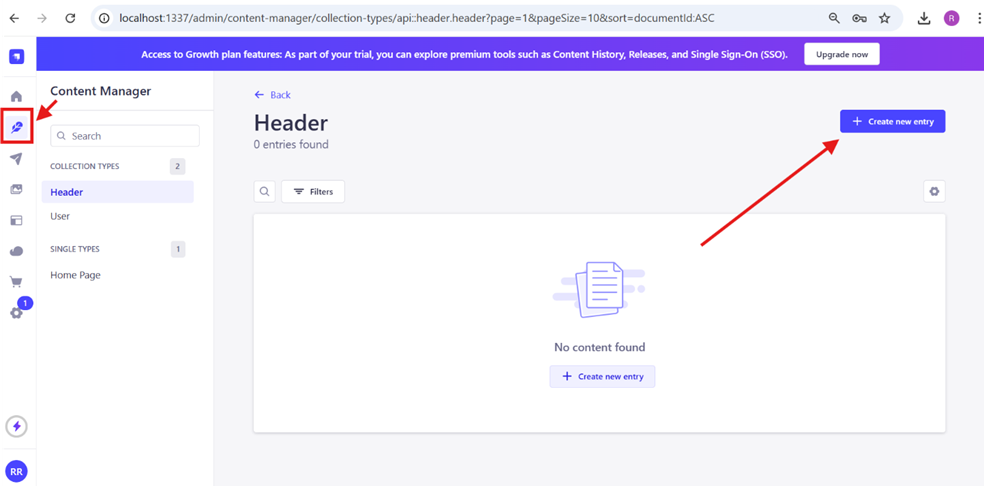
2. Content Manager: After creating Single Type or Collection Type items in the Content-Type Builder, the next step is to add content to these pages or components. We created the header component in the content type builder and now we add content to the header component. Please see attached screenshotfor more clarity.
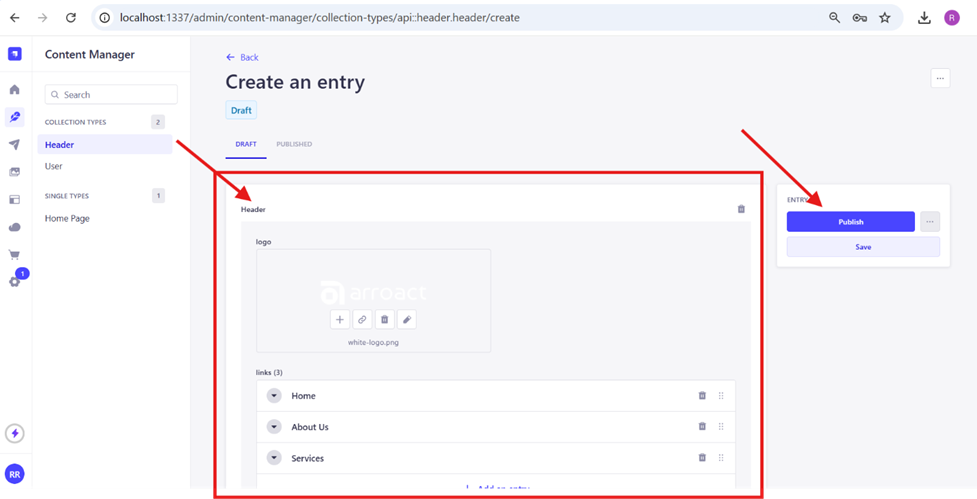
After adding content to the header component, it looks like the screenshot attached below.
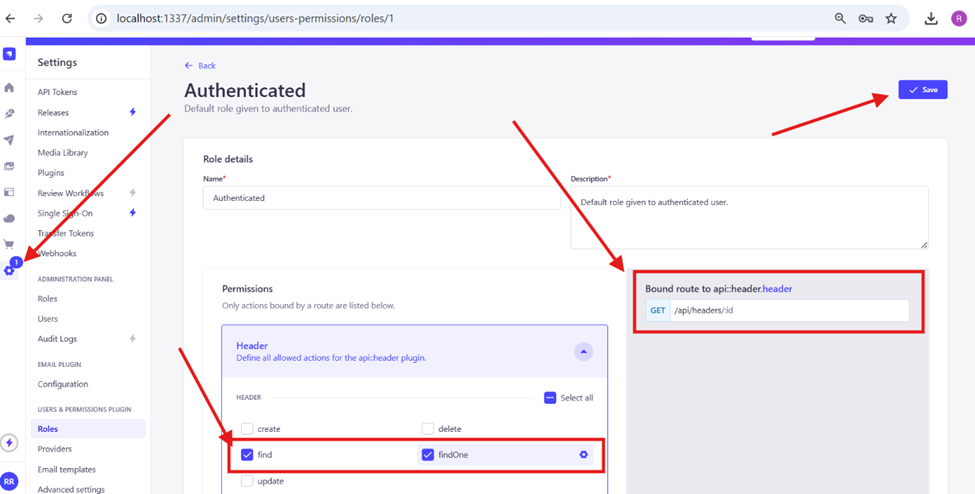
After publishing, you need to give permission to that component or page for the API response.To set permissions, follow the steps below:
Go to Settings > Users & Permissions Plugin > Roles > Authenticated or Public (select Public or Authenticated based on your requirement).
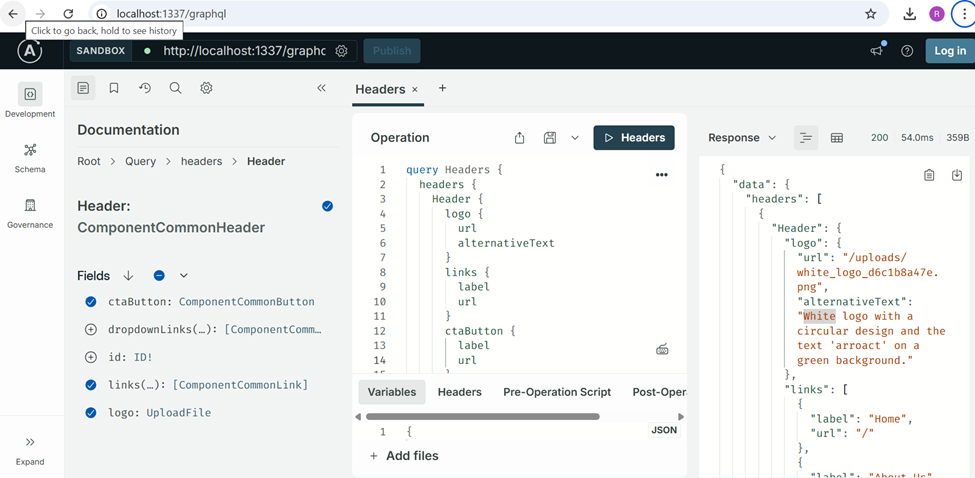
After that, to get the API response, install the GraphQL plugin using this
command:
npm install @strapi/plugin-graphql.
After installing GraphQL, go to: http://localhost:1337/graphql You will see the list of components and pages. You simply select the component and its fields – you don't need to enter field names manually. On the right side, you will get the API response. Please see the screenshot below.
Also, in the Strapi Marketplace, you can see lots of plugins. Please see the attached screenshot:

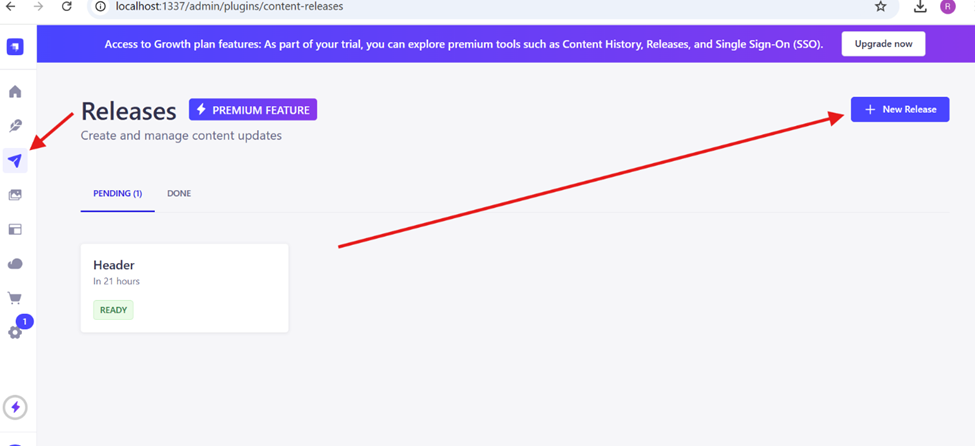
3. Releases: This feature is used to schedule releases. You can create multiple releases at the same time. For example, if you want to publish a blog, case study, or any single or multiple pages at a specific time, you can do this using this feature. Please see the attached screenshot where I have scheduled a release for the header.
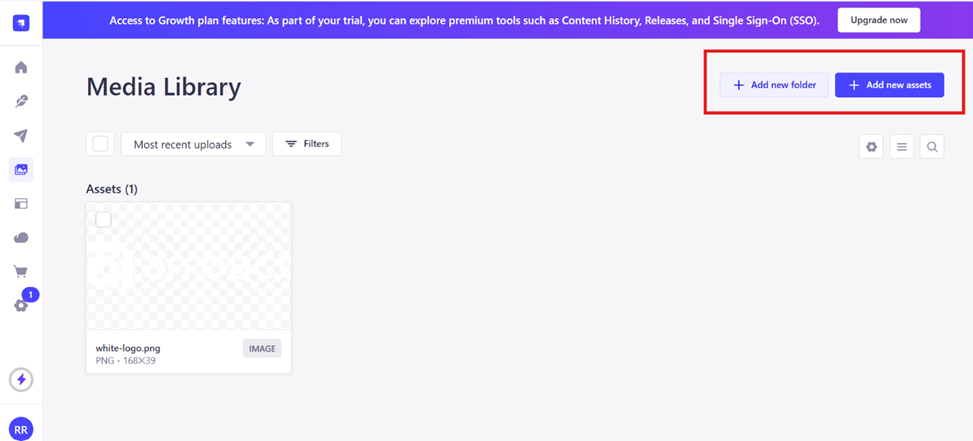
4. Media Library: In the Media Library, you can upload media assets into folders or individually. You can also create folders. Please see the attached screenshot where I added one image for reference.
5. Deploy: Strapi allows you to deploy your Strapi project to Strapi Cloud for free. In the free version, you don’t need to take care of the database, API, storage, or CDN—everything is managed by Strapi Cloud.
In the free version, the limitations are:
- 10K API requests
- 10 GB storage
- 10 GB asset bandwidth
- Global CDN
- Push-to-deploy
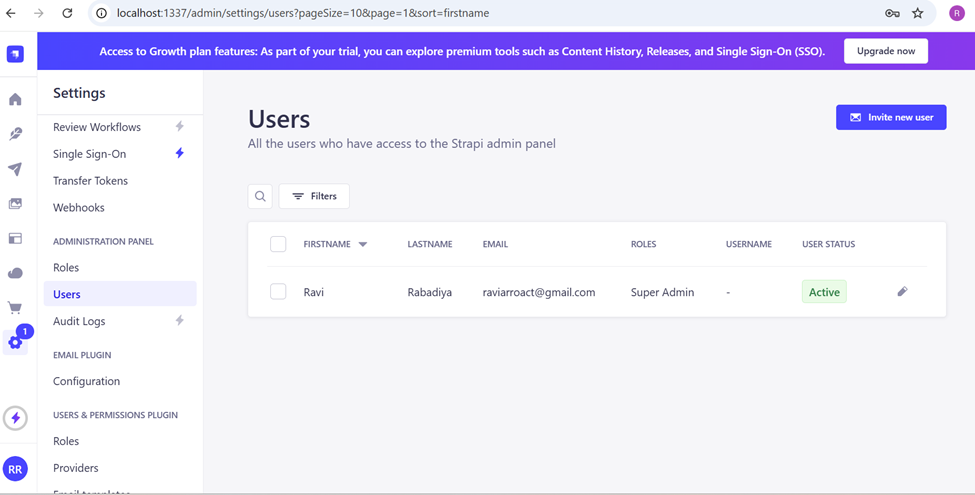
6.Settings: In Settings you will see many options. Let's say you want to add a new user - follow these steps: Settings > Admin Panel > Users. Here you can invite a new user to roles such as superadmin, editor or author depending on the requirement. It is also flexible; If you want to customize a role, that is entirely possible. Please see the attached screenshot for your reference.
Conclusion
Strapi CMS is very flexible and user-friendly. Everyone can understand it easily, and it does not have any complex structure if you explore all the points mentioned above. In today’s AI era, Strapi introduced the Strapi AI feature in the Content-Type Builder, which reduces your workload since it is managed entirely through prompts.
You can manage medium or large sites easily. Strapi also supports SSO (Single Sign-On), internationalization with AI translations, and webhooks.

Related Blogs

Read More