My First Adobe Experience Manager (AEM) Site – A Complete Step-by-Step Beginner’s Guide
This is my blog where I share how I create, customize and publish my first simple website in Adobe Experience Manager (AEM) - from scratch.
It includes starting AEM authoring and publishing, creating pages, editing components, and finally making the site publicly available.
Prerequisites:
Create author and publish folder differently where it contains:
aem-6.5-quickstart.jarlicense.property- Two zip files of the service package
Do not include or copy paste the CRX-QuickStart folder from the author to the publish folder, the author and publish folder will look exactly the same.


Pro tip:
- We don’t just copy paste crx-quickstart folder to author and publish.
- Add command once in cmd for author :
java -jar aem-6.5-quickstart.jar -r author -p 4502 - This will automatically create folder for it in the author folder and start to run aem author instance in 4502 port.
Also for publish folder write command in different cmd as: java -jar aem-6.5-quickstart.jar -r publish -p 4503. Which will also create the same folder by itself and start to run aem publish instance in 4503 port.
Author instance:
Steps for creating page for site :
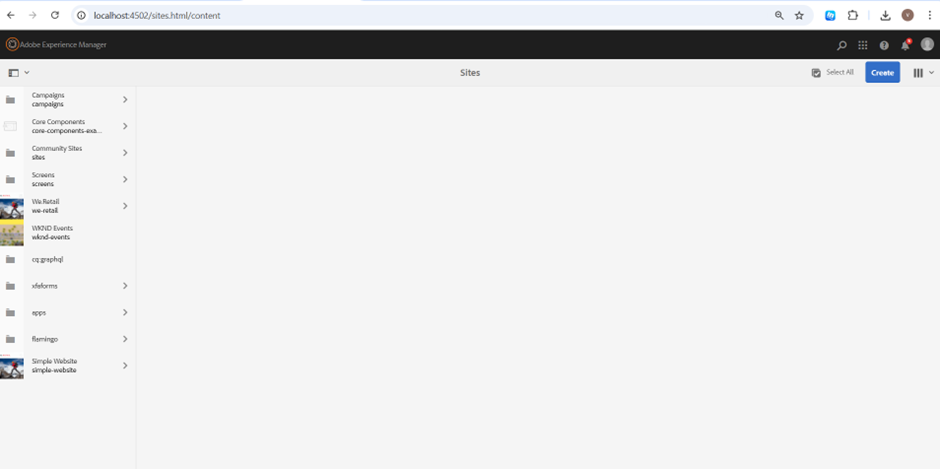
Step 1.Click on sites it will open various templates which are available select any one from that.

Step 2. For beginner level I have selected we.retail template and used to create my customized site page.
Step 3.After selecting template click on create it will show various option what you have to build in template so it will give various option such as: catalog , page, site , live copy , launch, language copy and csv report.
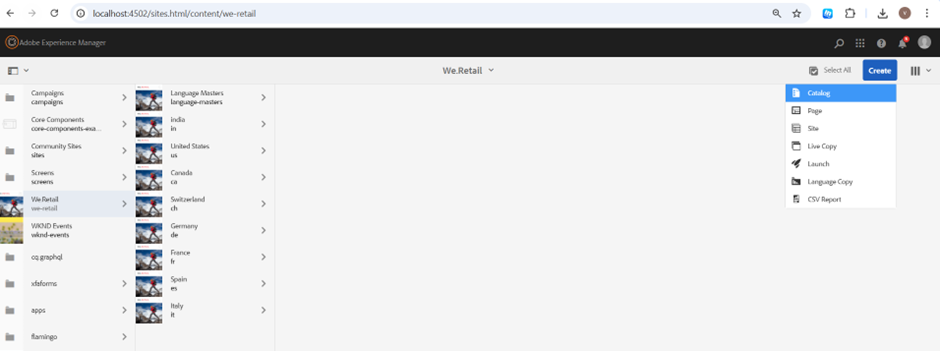
Step 4.Then after you have to select the which template site you have to create and select that accordingly.
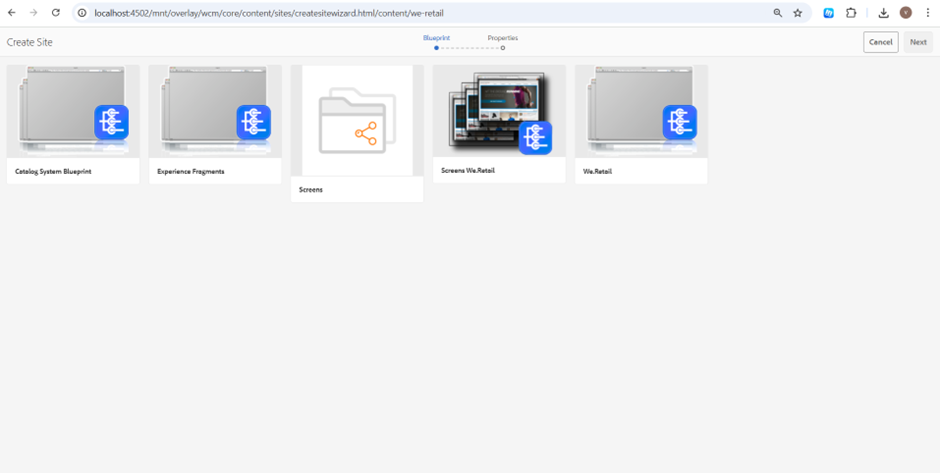
Step 5.Then after selecting and clicking on next you have to give properties for you site where to give title name , language and initial chapters(objects).
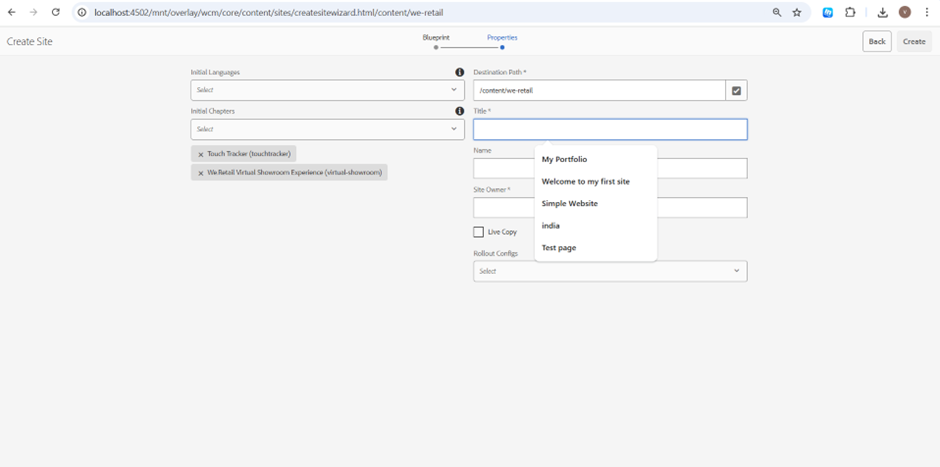
Step 6.After that your website will be visible on the left side of the pannel.

In my case I have created website page named as simple website which you can see at the left bottom.
Step 7.Select your website and at the top bar click on edit the editor page of your website will be open in new tab where you can customize things according to your requirement.

Step 8.Header, footer and the different objects can be removed by hovering your mouse to the component and then after clicking on the trash icon where you can make your site more clean.
Step 9.On the left side of pannel in drop down it has assets, components and content tree where :
- Assets are used to enter , drag and drop the image in the container.

- Components are for adding caraousel , layout container , image layout , link button , list and various other things.

- Content tree is basically the structure of the website.

Step 10.Now let’s see how to publish your website once it is created:
- Click on your website it will pop up pannel where click on either quick publish or manage publication(recommended).


Click next and it will ask for publishing the site.

After confirming your site will be published.

Success message will be shown to the top.
You can also update , make changes into the crxde lite where you can see the structure of your website in content root.

Boom!!! this is your publish instance where you can only visible your website.

Issues:
Author and Publish are using the SAME repository, so when you log in to one, the other gets logged out.
This happens because you started author and publish instance with the same quickstart folder so each folder should be separate and includes only:
aem-6.5-quickstart.jarlicense.properties
Solution:
Make the author and publish folder differently also do not copy and paste the crx-quickstart folder to any of it.
While completing this setup- from running AEM both author and publish instances to designing and troubleshooting it has really helped me to buid a solid foundation in the AEM ecosystem. With this on hand experience, I feel ready to dive in more advanced development and tackle the real world projects.

Related Blogs

Read More
Read More
Read More