Ai -Based Smart Newsletters Subscription in Umbraco with N8N
I've developed a simple website newsletter subscription powered by AI. Whenever a product or content page goes live in Umbraco, this setup triggers an automatic email based on a predefined template. To implement this, we use the latest Umbraco version with webhook capabilities — in this case, Umbraco 16 along with the current build of n8n. Let's begin setting up the newsletter subscription; this entire process will be divided into two parts: one for Umbraco and the second for n8n. Below are the steps you need to perform to create the subscription.
Umbraco Side
Create a form for subscription or collect emails for newsletters on the website.
- Install the Umbraco Forms plugin into your Umbraco project.
- Go to the Umbraco backoffice and create a form for the Newsletter.
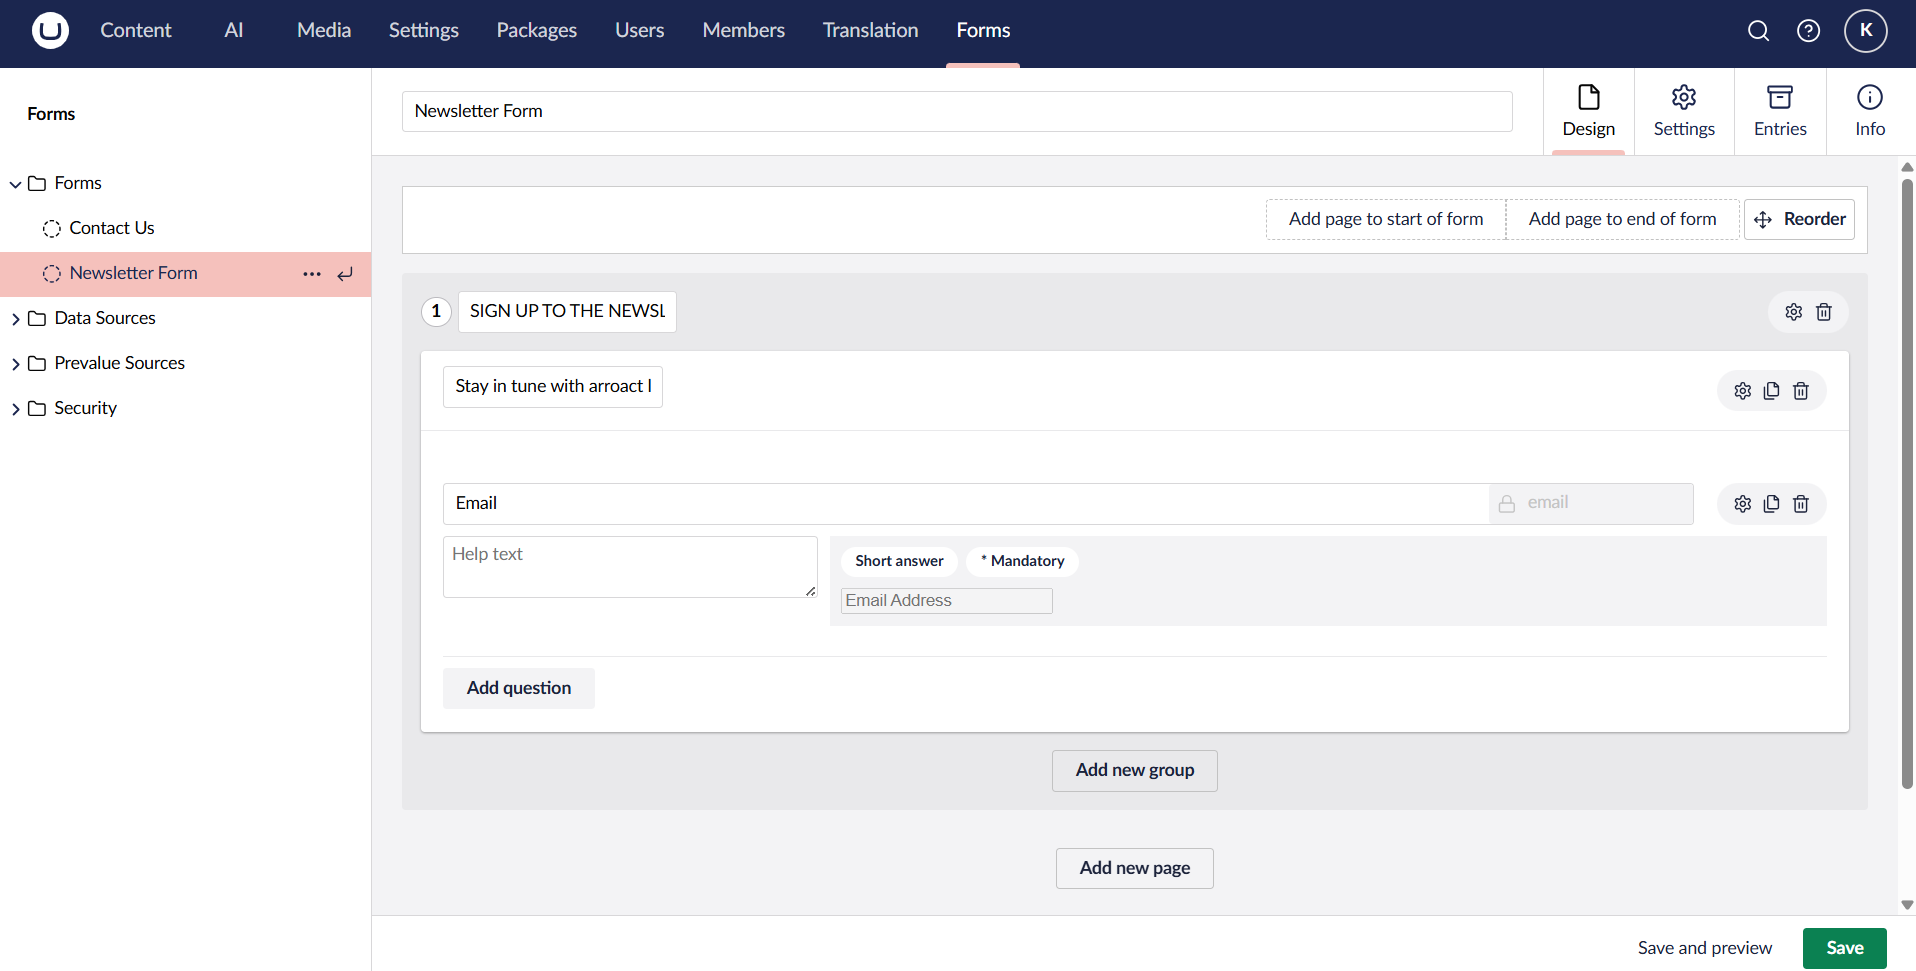
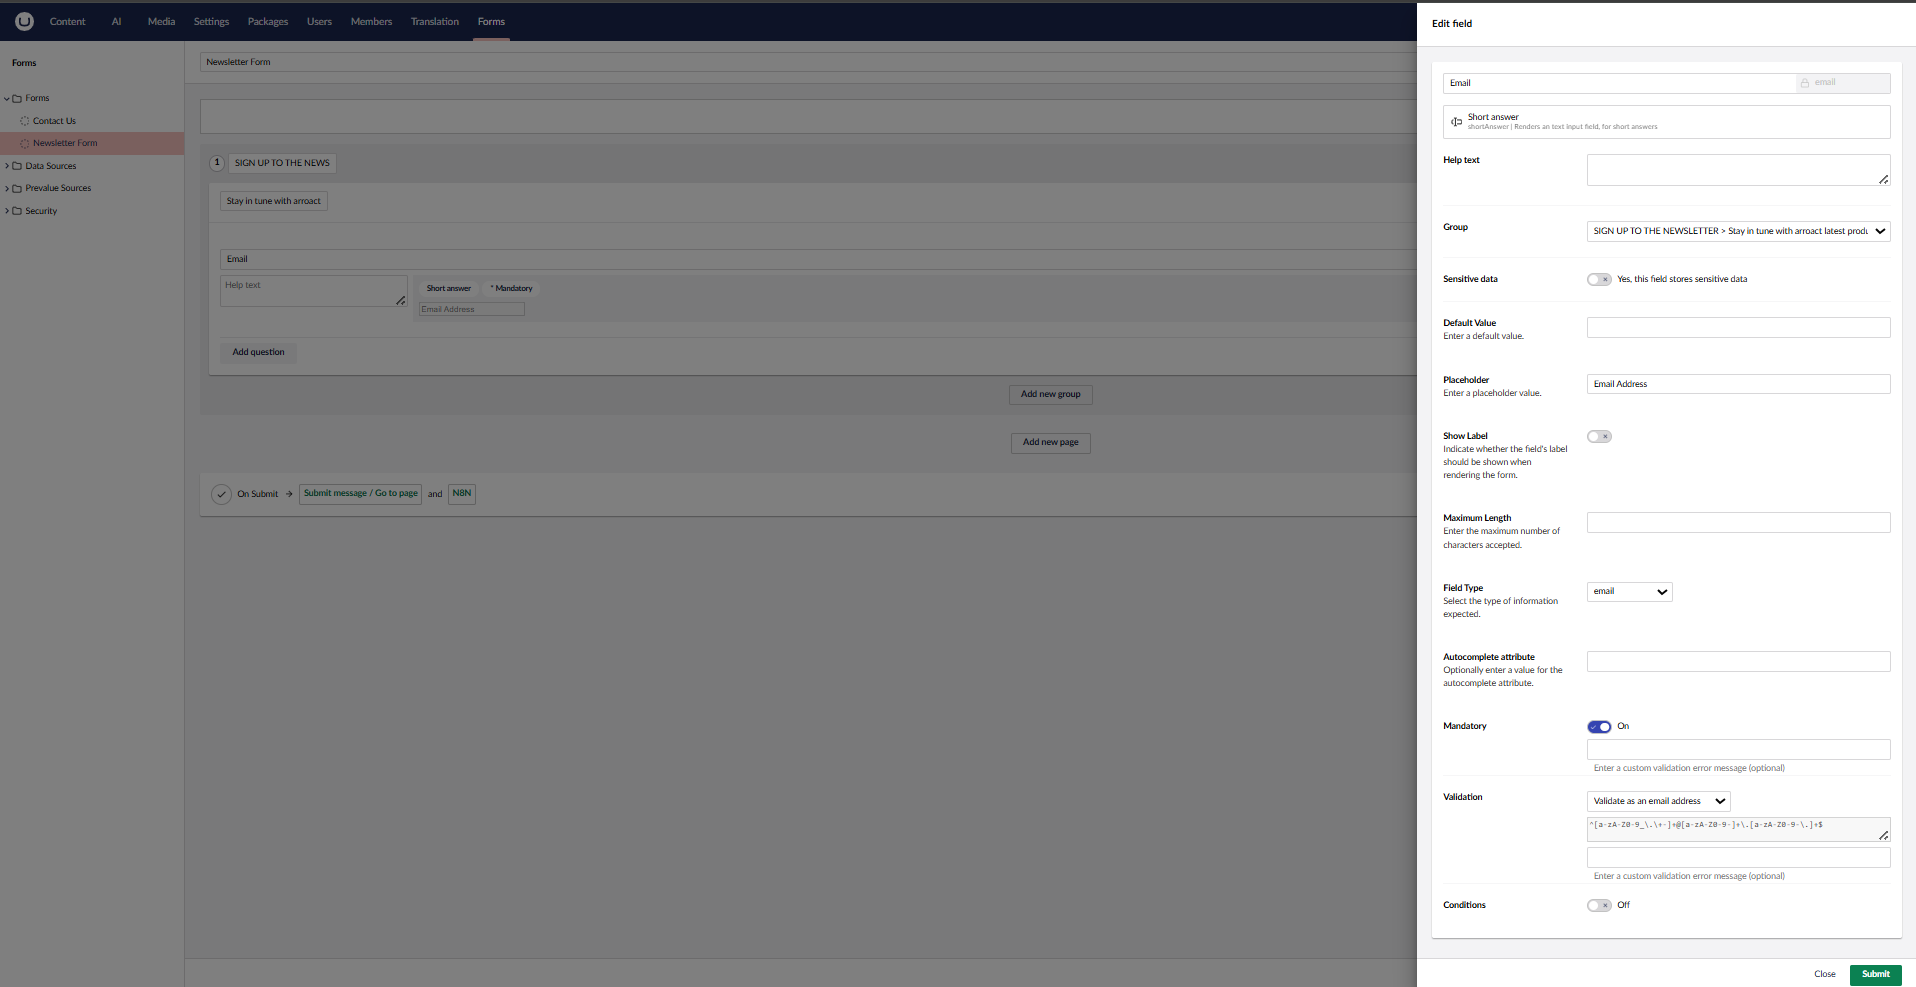
- Add a question/field to the form with the type 'Short Answer' and field type 'Email'. Make this field mandatory and set the validation to 'Email Address'.
Now our form is ready for collating all data from the website. To apply this form in your master file so that all pages have the Newsletter Form available, go to your template, select your master file, and add the following code: (I applied this form statically; you can apply it dynamically. For that, please refer to the link below.)
https://docs.umbraco.com/umbraco-forms/developer/rendering-forms
code:
@await Component.InvokeAsync("RenderForm", new { formId = Guid.Parse("<form guid>"),theme = "default",includeScripts = false })
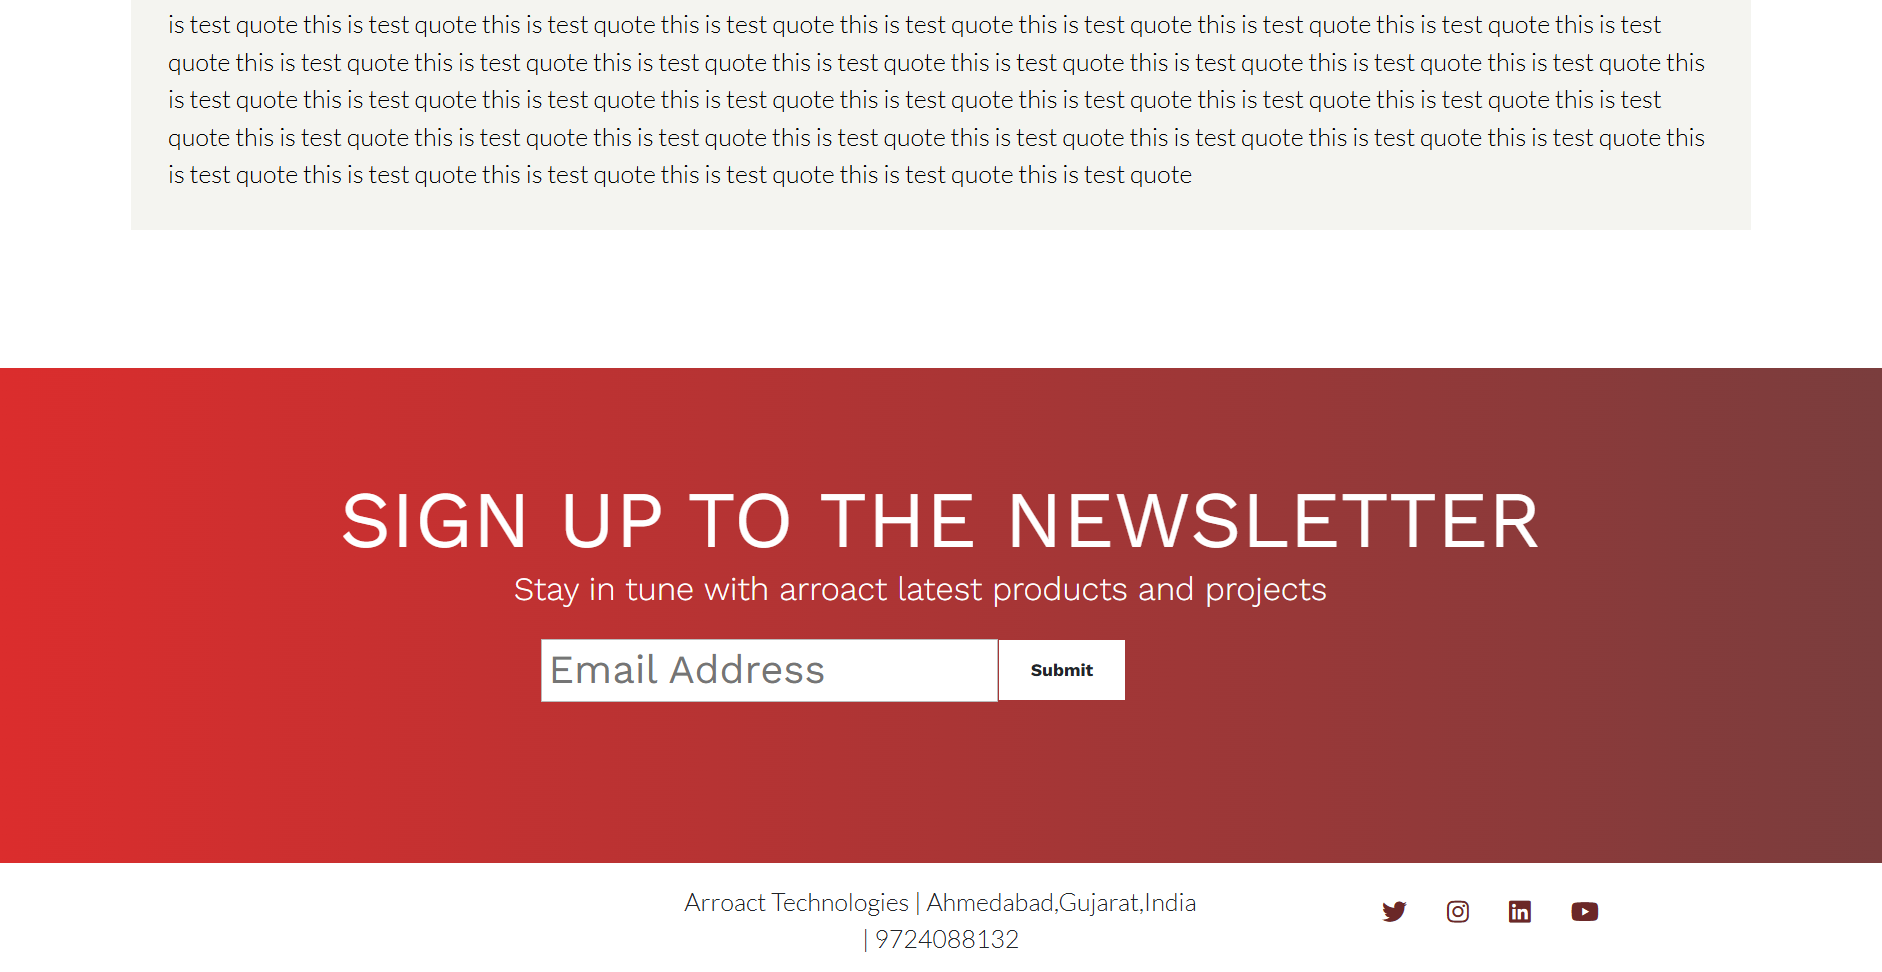
Now that our page is ready with the form, go to your website and refresh the page.
Okay, now that our Umbraco journey is complete, let's jump into n8n!
n8n Setup
Go to your n8n instance and create a new workflow. Name it "Umbraco Newsletter" and then follow the steps below:
- Add a Webhook node. This will serve as our input, allowing us to connect our Umbraco website fo both form submissions and content publish events.
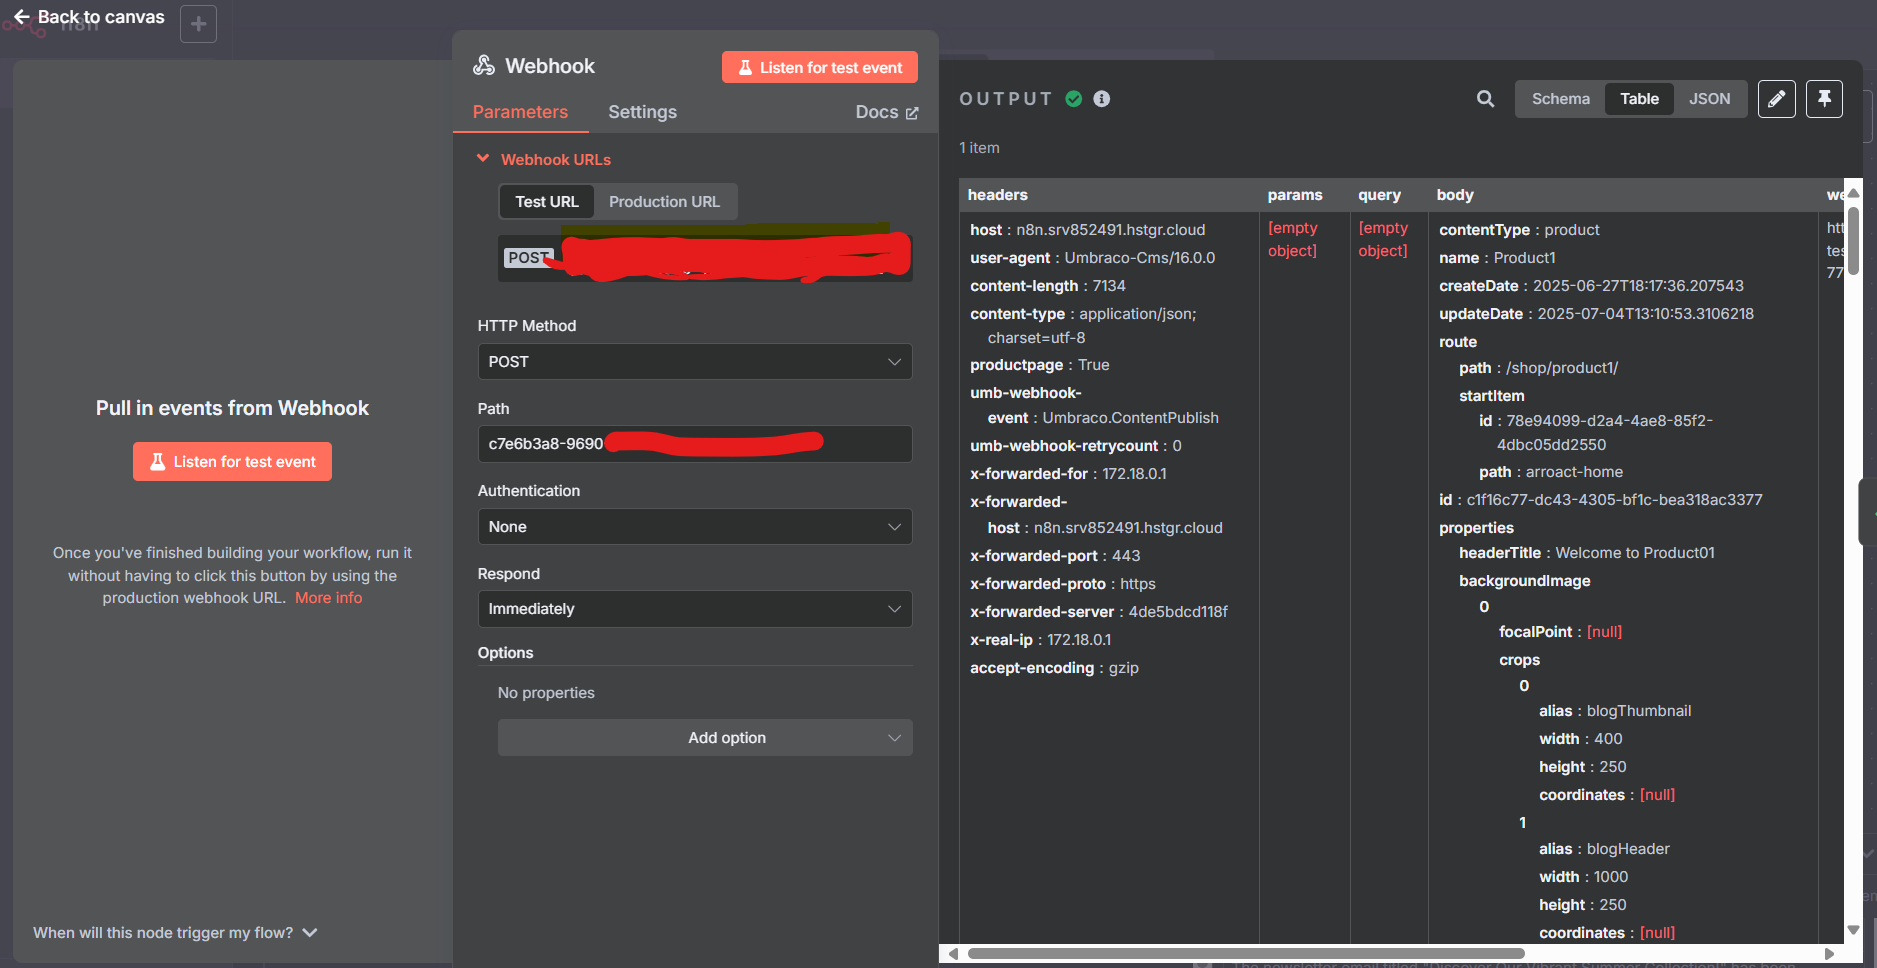
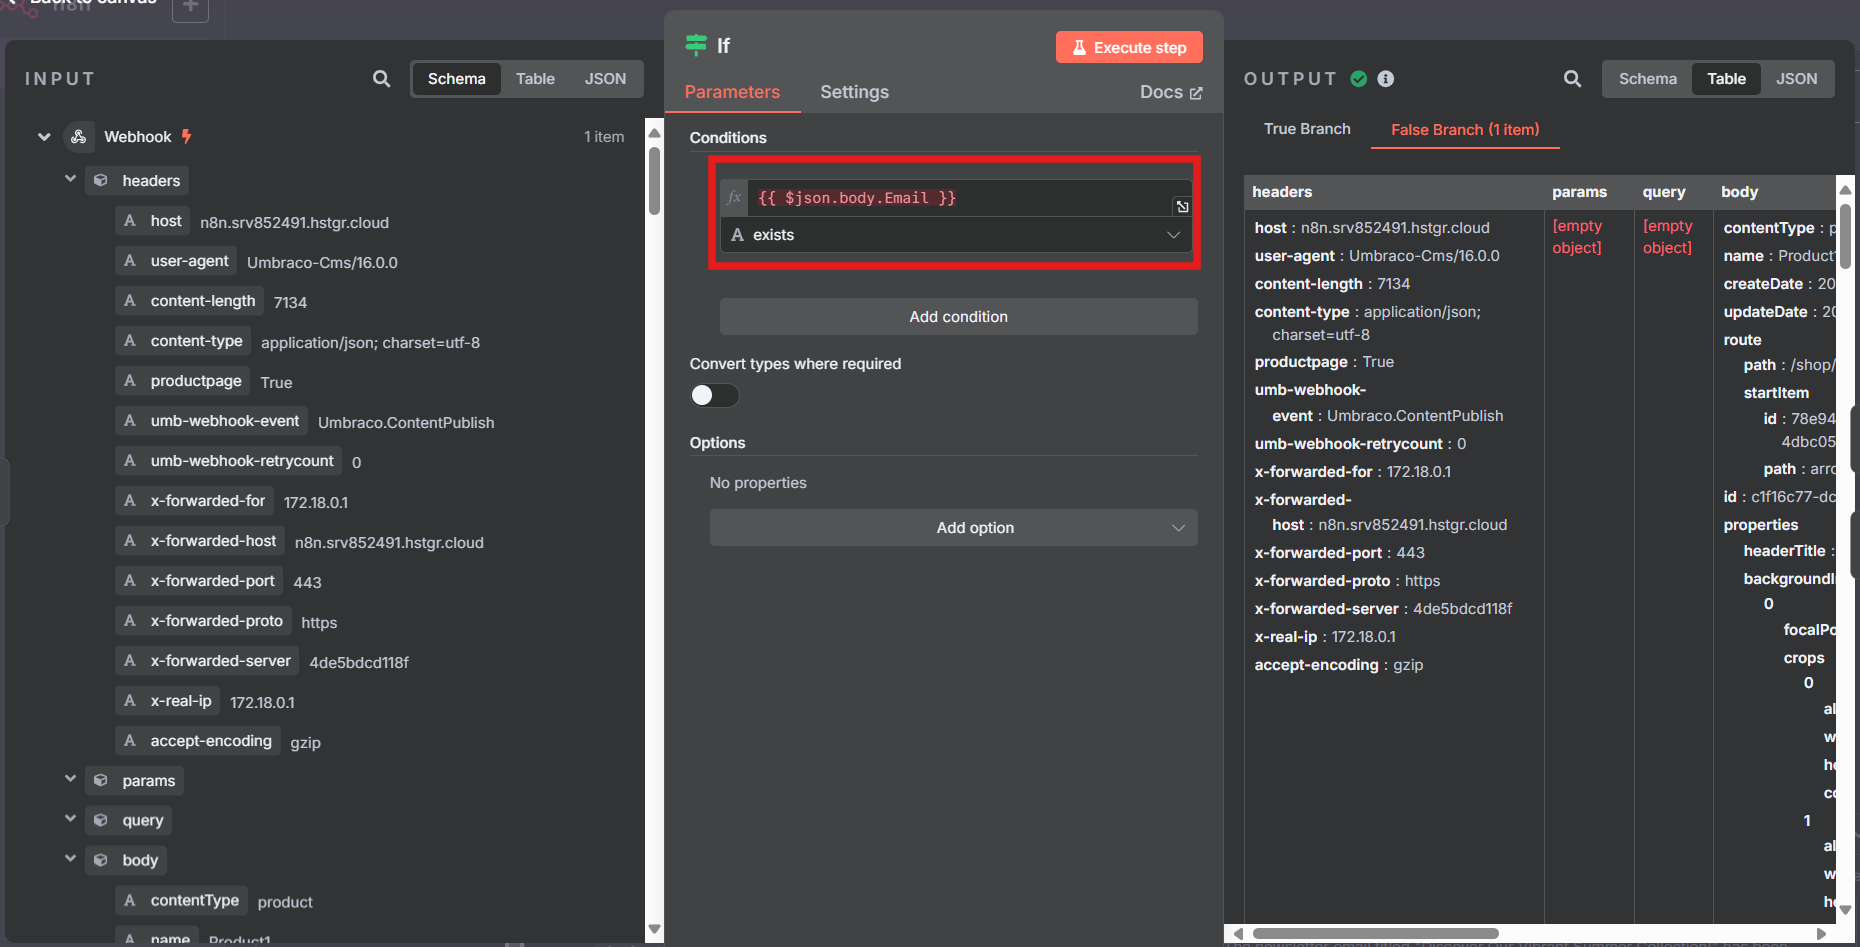
At this point, I have one webhook that collects data from forms as well as content publishes from Umbraco. So, let's use an If condition (or If node) to identify whether the request is coming from a form submission or a content publish event.
- Add an If node in n8n and configure it to check if an email ID exists in the webhook's body
- Now, if an email is available, this indicates the request is coming from the form. In this case, we need to store this email in a database or an Excel sheet. I'm going to use Google Sheets for storing newsletter emails.
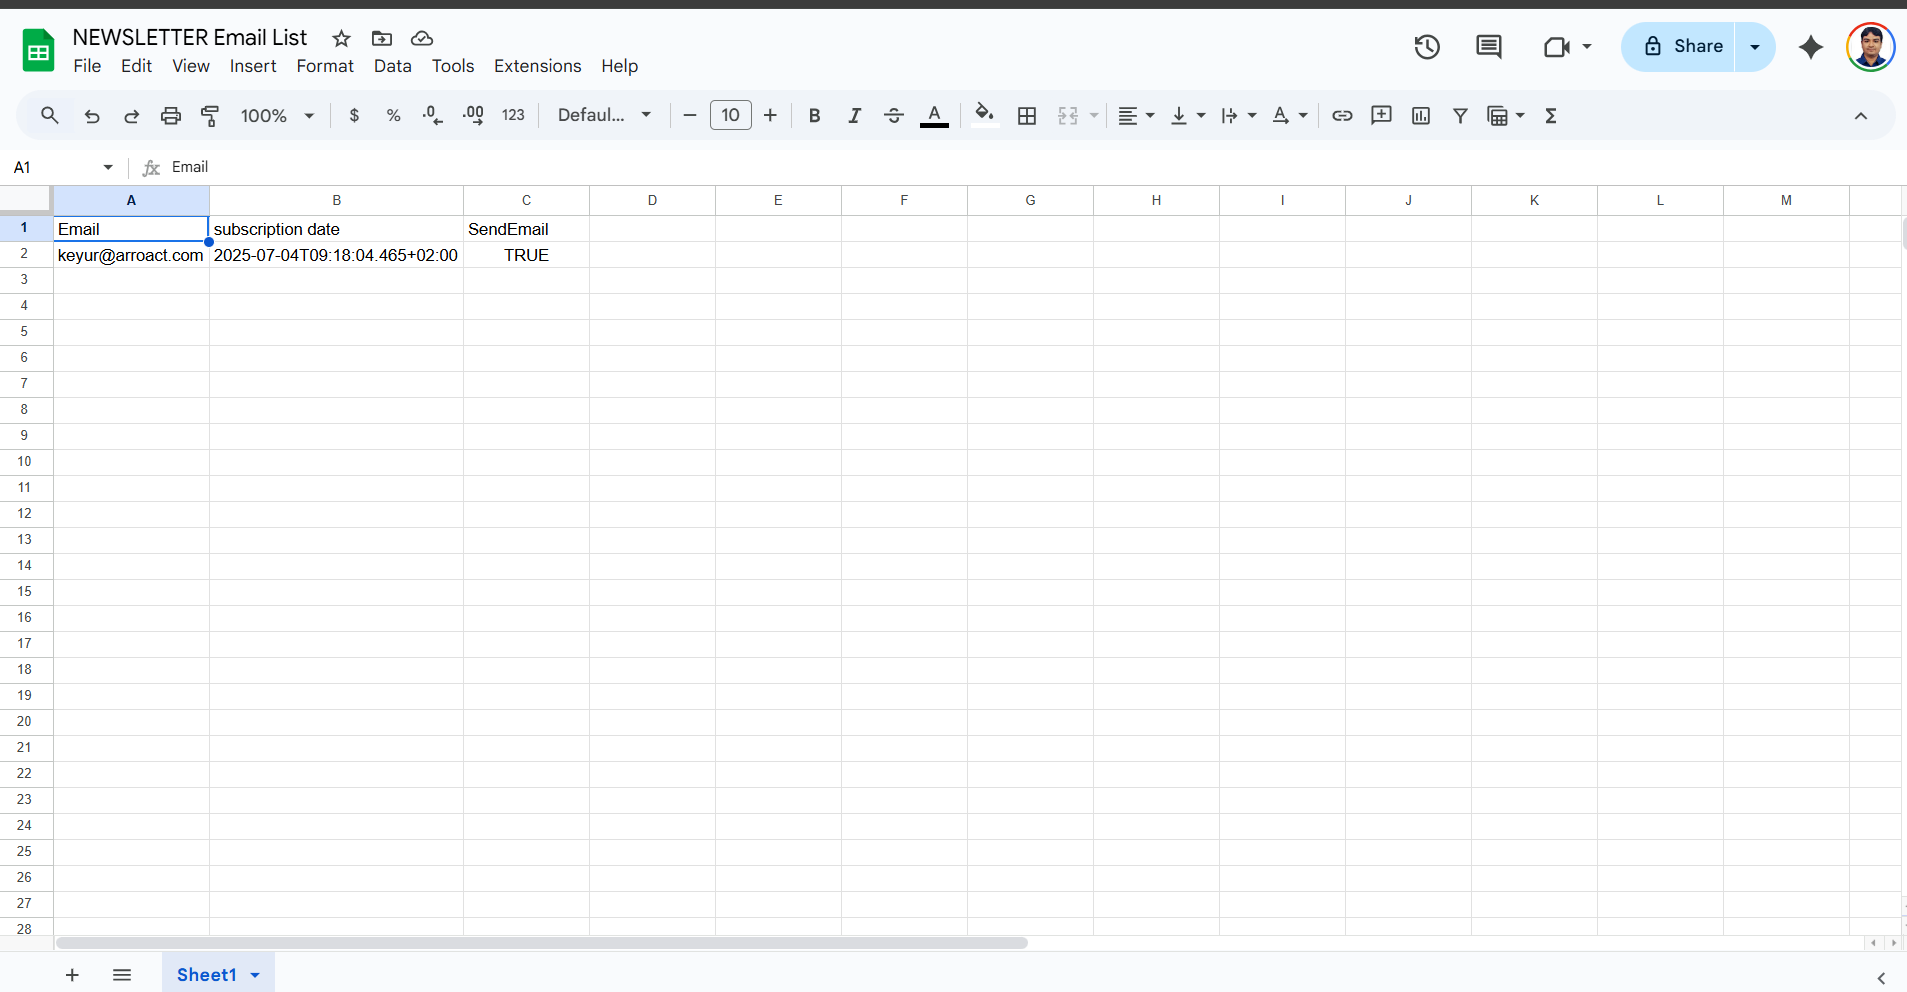
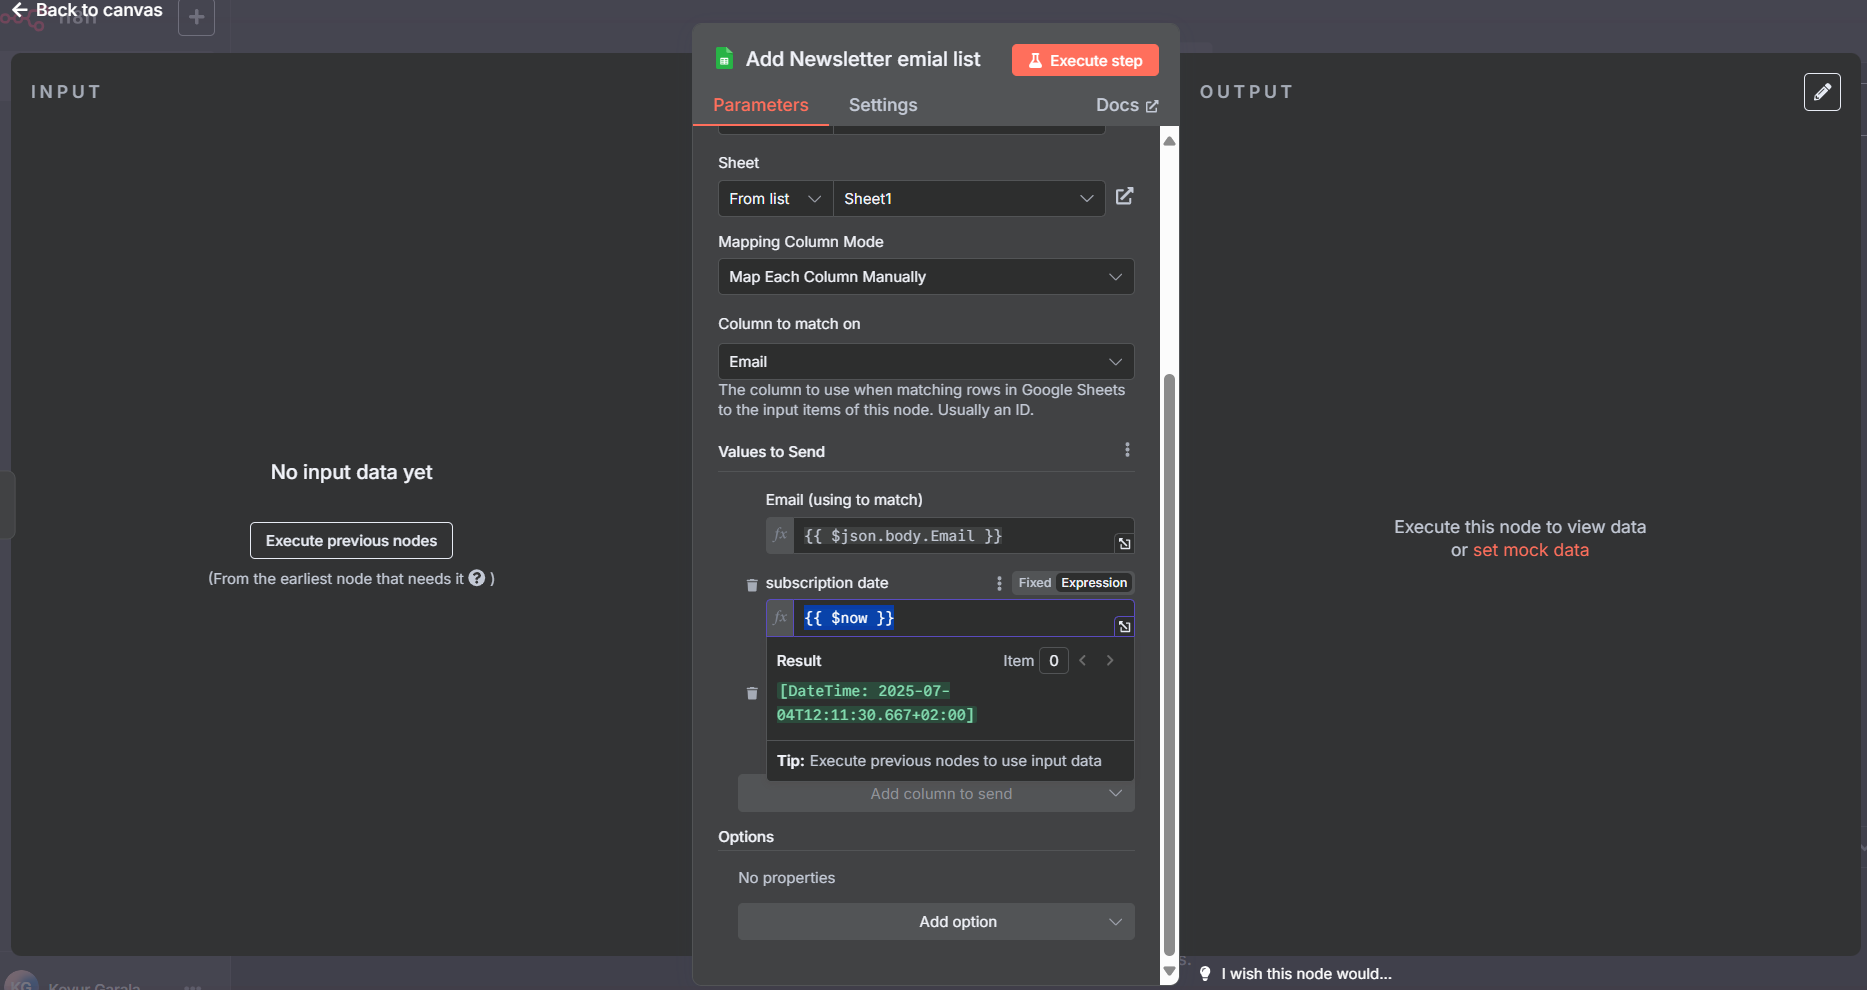
- To save data in Google Sheets, add a Google Sheets node to the 'true' branch of the If condition. Click the plus (+) icon and select the Google Sheets operation 'Append or update row'. Next, select your document and the specific sheet where you want to store your data. Then, select the email column to match on, which will help prevent duplicate entries. Finally, map the values to send: {{ $json.body.Email }} for the email address and {{ $now }} for the subscription date.
Now, our n8n workflow is ready to receive requests from our Umbraco website and store emails for newsletters.
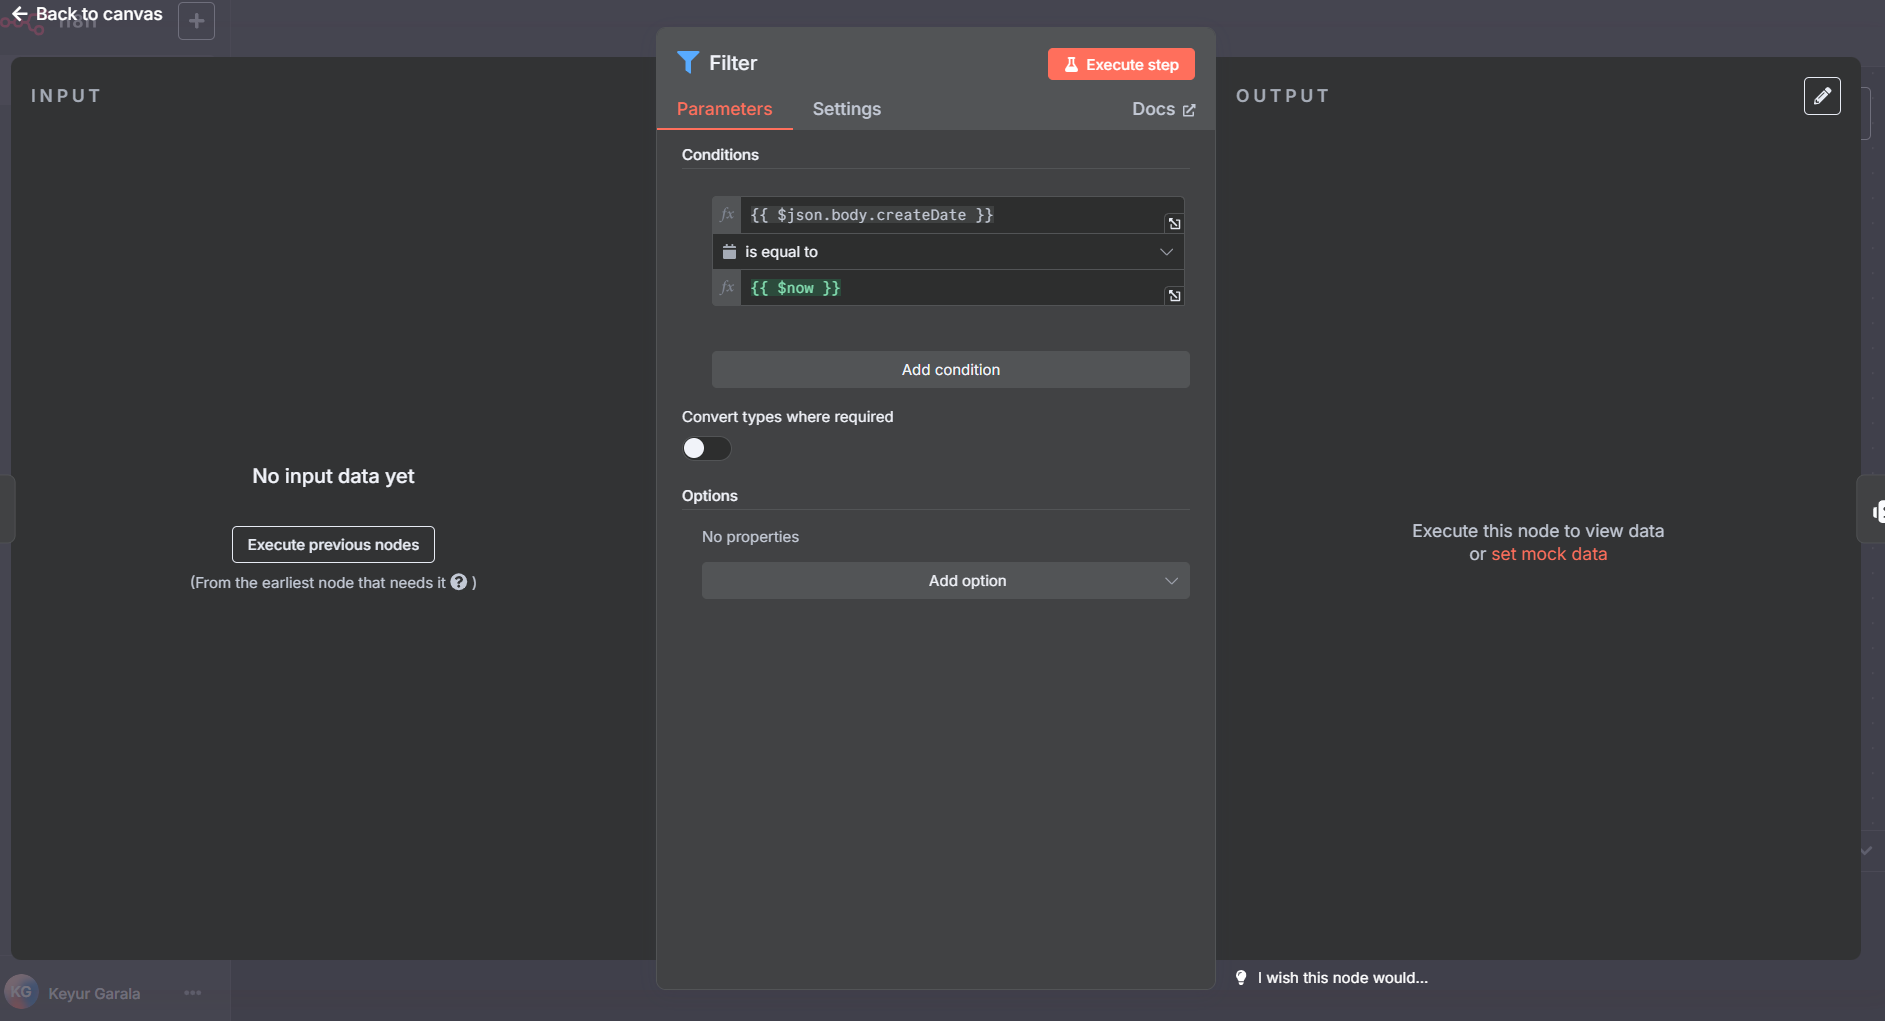
- Next, we need to send an email notification if any product is published on our website. For that, we need to add a flow to the 'false' branch of our n8n If node. Click the plus (+) icon on the 'false' side. Begin by placing a Filter node that checks whether the published product is newly created or simply modified. This can be done by comparing the content’s creation date with the current date.
- Now, if the request is coming from an updated product, it will bypass this part of our flow. Next, we need to add an AI agent to identify the request, collate all necessary data, create an email, and send it to our entire email list.

- In this email flow, I'll use an agent connected to an OpenAI model, which will help create the email template and generate the email content. Apart from this, you'll also need to add some tools like an 'Email Send' node (responsible for sending emails) and a 'Google Sheets' node with the 'Get Row(s)' option in read mode, so we can retrieve all email addresses and send emails one by one.
- Now, for the final step of your n8n workflow, you need to add an AI Agent with a prompt to identify the page's values, create an email template, and finally send it to all subscribers.
Below is my prompt. Note that the prompt will also require the HTML of your basic email template. You can connect an additional HTTP Request node to fetch your email's HTML body from a URL if it's hosted elsewhere.
You are an Email Newsletter Agent specializing in transforming page content into engaging email newsletters,
and then distributing them to a target audience.{{ $json.body }}
HTML Example Template :
<!DOCTYPE html>
<html lang="en">
<head>
<meta charset="UTF-8">
<meta name="viewport" content="width=device-width, initial-scale=1.0">
<title>Our Latest Summer Collection -</title>
</head>
<body>
<div class="container">
<section class="main-content">
<h2>{{ $json.body.name }}</h2>
<p>{{ $json.body.content }}</p>
</div>
</section>
<footer>
<p>This is a simulated Umbraco page content for demonstration purposes.</p>
<p>Visit our main website: <a href="https://example.com" target="_blank">www.example.com</a></p>
</footer>
</div>
</body>
</html>
Your main task is to pull out the essential content from the published page, write a compelling email with a fitting subject line, and then send it to your subscriber list using the tools you've set up.
Tools Available:
NewlatterEmailList: This tool provides access to a Google Sheet. Your specific action with this tool is to read email addresses from a designated column within this sheet.
Usage: NewlatterEmailList.read_emails() (Assumes this function reads the relevant column and returns a list of email addresses.)
SendEmail: This tool allows you to send emails.
Usage: SendEmail.send(to_email, subject, body)
Now that our n8n setup is complete, the last step is to connect our Umbraco instance with n8n.
Go to your Umbraco backoffice, navigate to your Newsletter Form, and configure a workflow. Add a new workflow and select "Send form to URL." Add the following fields:
- Workflow Name: N8NURL (copy this URL from the n8n webhook)
- Method: POST
- Fields: Email
- Save all changes to your Umbraco Form.
Go to Settings -> Webhooks and create a new webhook. Enter the details below:
- URL: (copy this URL from the n8n webhook)
- Events: Content Published
- Content Type: Product
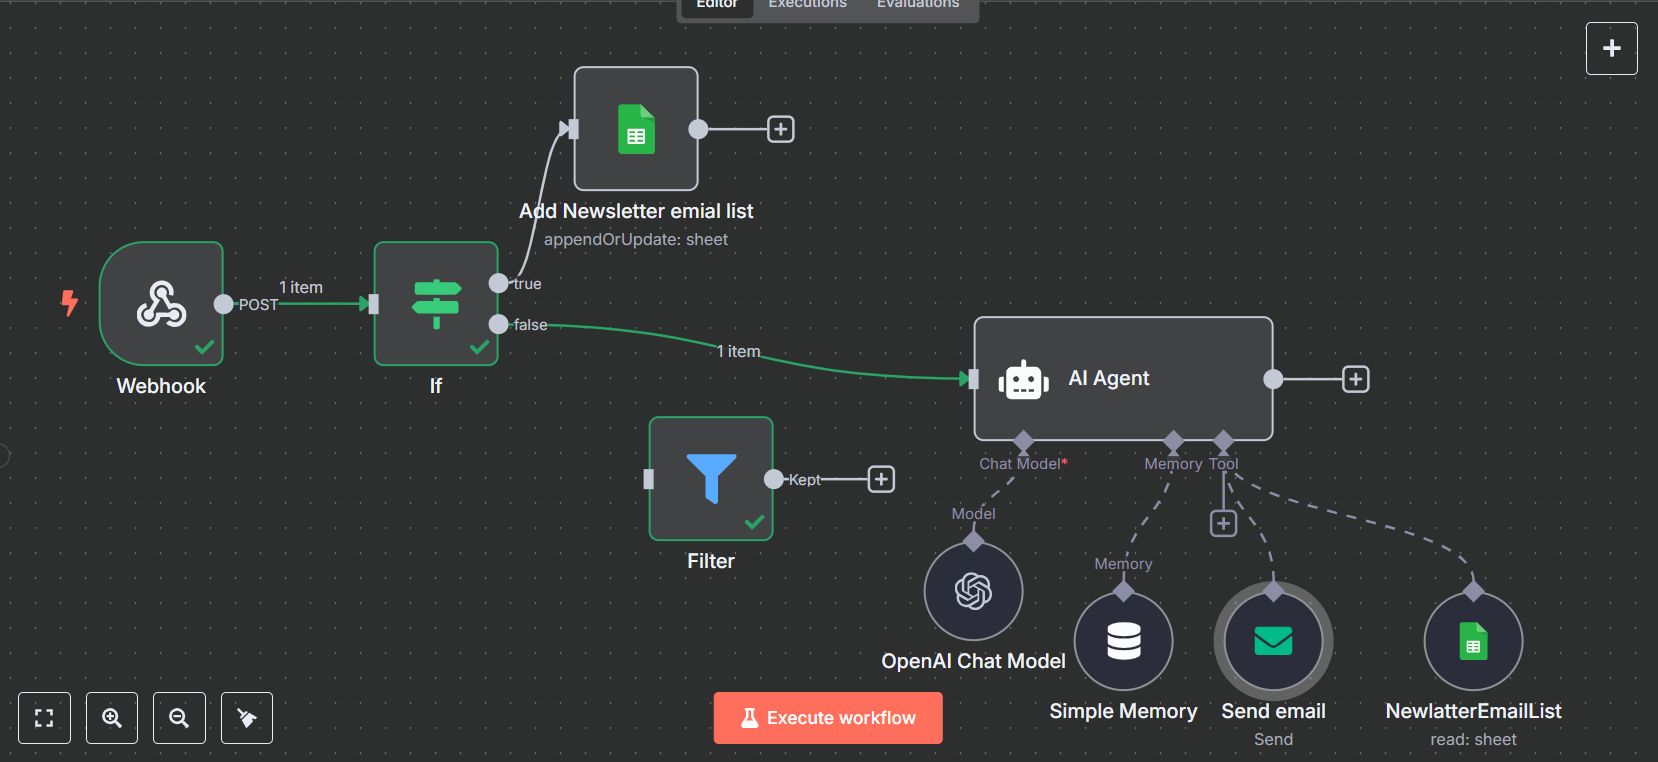
Now, everything is set up! You can test the entire flow in your environment. Below is a screenshot of my n8n workflow.
Thanks for checking out my technical blog! I hope you found the content helpful and informative.
Feel free to send any questions you have to keyur@arroact.com

Related Blogs

Read More
Read More

Read More