Guide to Snowflake Command Line Interface Tool: Snowflake CLI
In many cases, when a particular person doesn’t want to be exposed to Snowflake SnowSight UI , but the ask is he or she should be able to perform developer related operations on Snowflake Objects, then where Snowflake CLI comes in. Or in some cases, when there is a need to connect to Snowflake using some tool, then where Snowflake CLI comes in.
In this particular blog, we will see how to install & configure Snowflake CLI & how we can work with it to execute SQL Statements for Snowflake development.
What is Snowflake CLI?
Snowflake CLI is an open-source command-line tool explicitly designed for developer-centric workloads in addition to SQL operations. It is a flexible and extensible tool that can accommodate modern development practices and technologies.
With Snowflake CLI,
- We can connect securely to Snowflake
- Manage Snowflake objects & stages
- Execute SQL Statements
- Manage Snowpark Container Services
- Manage Snowflake Native Apps
- Manage Streamlit Apps
- Use Snowpark in Snowflake CLI & Snowflake Notebooks, etc.
Installing Snowflake CLI on Windows using package manager:
- Download the installer from the Snowflake CLI Repository: https://sfc-repo.snowflakecomputing.com/snowflake-cli/index.html
- Install the downloaded installer & follow the installation steps.
- Check whether Snowflake CLI was successfully installed in your system by running following command:

Installing Snowflake CLI using Python:
- Check available versions of Python Installed in your System:
py -0 - Use specific version of Python to install Snowflake CLI:
py -<your_version> -m pip install snowflake-cli - Check whether Snowflake CLI was successfully installed in your system by running following command:

Connecting Snowflake CLI to Snowflake:
Snowflake CLI uses a global configuration file called config.toml to configure connections and logs for Snowflake CLI.
- Open or Create
config.tomlfile (using VS Code command-line launcher):

2.Define Snowflake Connection Details inside it like following:
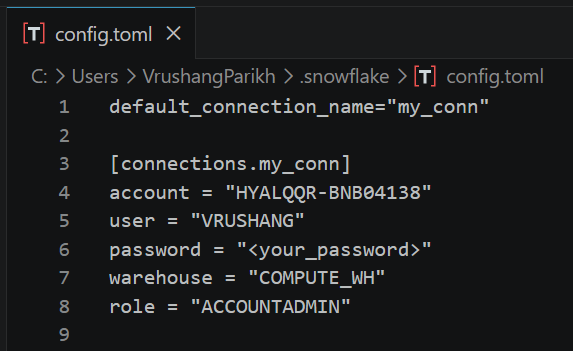
Note: In the account & user parameter, provide your account identifier & username. You can also choose warehouse & role as per your needs.
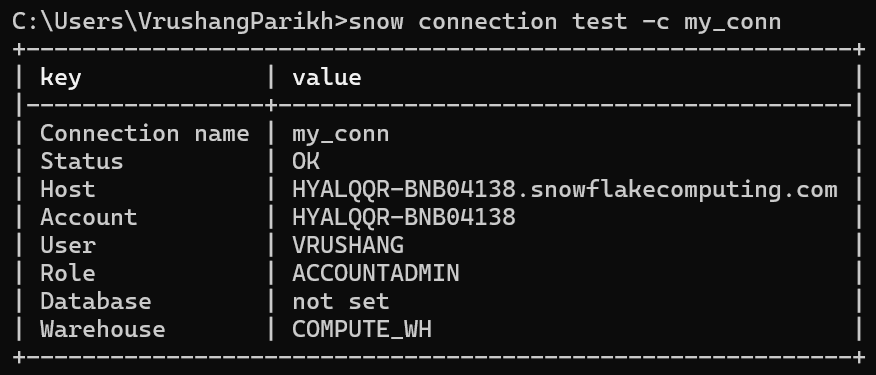
- Now test the connection with below command:
4. List all available snowflake connections:

Getting Started with Snowflake CLI Commands:
Create the database inside snowflake:

Create the schema inside that database:

Create the internal named stage:

List files inside stage:

As currently no files are uploaded, it showing No data.
Upload a file into stage:

Now again list the file:

And this time, we can see one file loaded into the stage.
Now I am making some changes in my local csv file. And let’s try to upload that again into stage:

As you can see, the status showing as SKIPPED. But what if I want to upload & overwrite that file again into stage. Then we can use --overwrite option while uploading that same file again:

Create csv type file format:

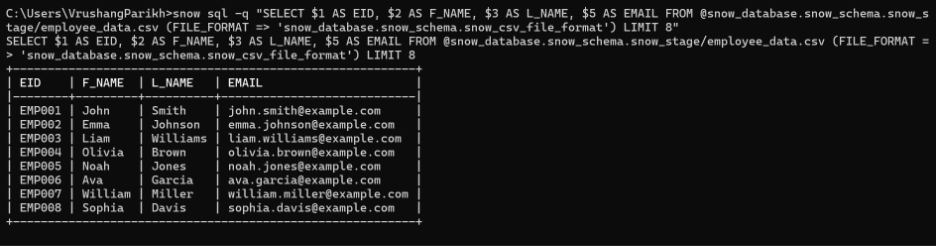
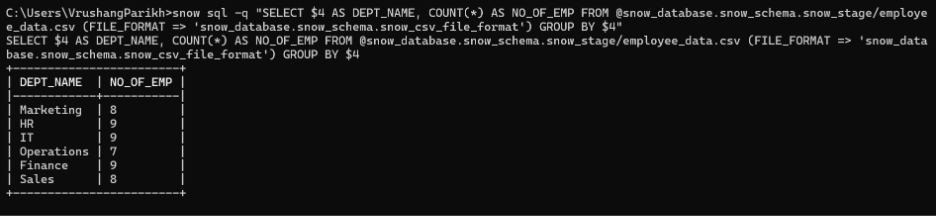
Now let’s query the data from the file in stage:
Let’s perform some aggregation:
Create the table:

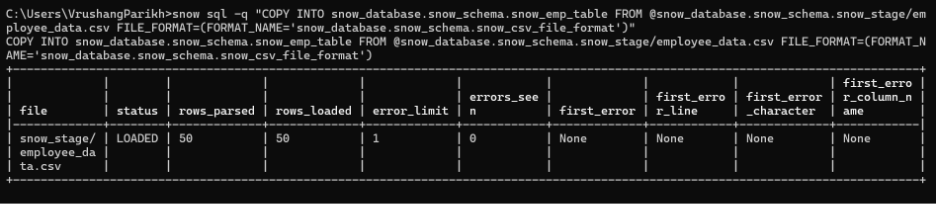
Copy data from stage into table:
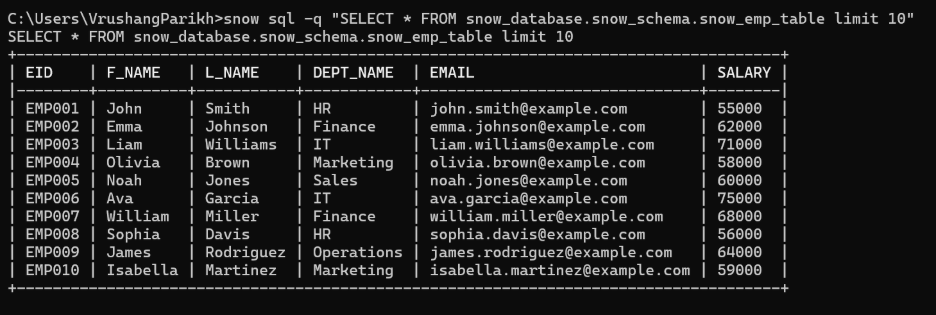
Query the data from table:
Now let’s remove the file from stage:

Unload data from table into stage:

List files inside stage again:

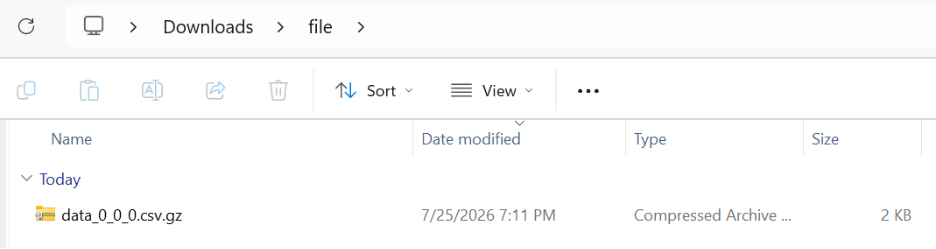
Get the data from stage to our local file system:

Conclusion:
Simple and effective interaction with Snowflake via CLI is empowered and simplified with Snowflake CLI. Basic actions such as logging to Snowflake, working with Snowflake objects, and even managing schemas and executing SQL queries can be done without the web UI by knowing the basic commands.
Snowflake CLI is also superior over Snowflake's old CLI tool SnowSQL in enabling automation, developer-oriented workloads, git integrations, and so on.
Lastly, to fully utilize Snowflake's robust data platform, practice the commands covered in this guide and progressively improve your Snowflake CLI skills.

Related Blogs

Many teams choose Snowflake because it "just works smoothly without complication."…
Read MoreArroact is ready to help you grow.
Our Office

Westface, 519/520, Bhagwat Bungalows Rd, Thaltej, Ahmedabad, Gujarat 380059


Pay us a visit for a cup of coffee. We’ll be more than happy to welcome you.