
How to use Arro Simple Form in Umbraco 13 to 17
Arro Simple Form is a dynamic form for Umbraco work with version 13 to 17 by help of Arro Simple Form user can create form runtime and collect form data from live website without any latency of website speed no downtime no speed compromise not just that but user can collect submissions and send automatic emails upon form completion
Why Arro Simple Form?
- Drag-and-Drop Interface
In Arro Simple Form you can create form by just drag input from panel and drop in your form it’s automatically collect data according input type.
- Multiple input type
It’s not just text input type you can use head tag like h1 h2 and many more for display your message to user apart of this static or html tag you can also use text, number, hidden, dropdown, autocomplete, file upload etc. so you can design form according your requirement
- Data collation
When you create form by default you need to add button for connect data and button type must have submit this save all submitted data in database and you can show that data in Umbraco Backoffice.
- No Code
All this function or workflow of create form and use that form in your website page or pages user no need to add any code in backend because of this no downtime occurred during create and use form in page
- Security
Arro Simple Form use Anti-forgery tokens into form so that no one can submit form without using page and all file data save in binary format in database not in folder server side so that file never going to execute or run in server.
- Notification
Arro Simple Form provide functionality for send notification email when user submit form you can manage more than one email address who can receive form submission notification
Those all are benefits of Arro Simple Form now let’s talk about how you can implement or add Arro Simple Form into your Umbraco project.
NOTE: this package only support Umbraco 13 to 17 old version of Umbraco like 7 or 8 this package is not going to work.
Step1: Install Package in your project
Open your project in Visual Studio and go to Tool >> NuGet Package Manager >> Manage NuGet package >> Browse tab and search for ArroSimpleForm or Arroact you can find package in NuGet
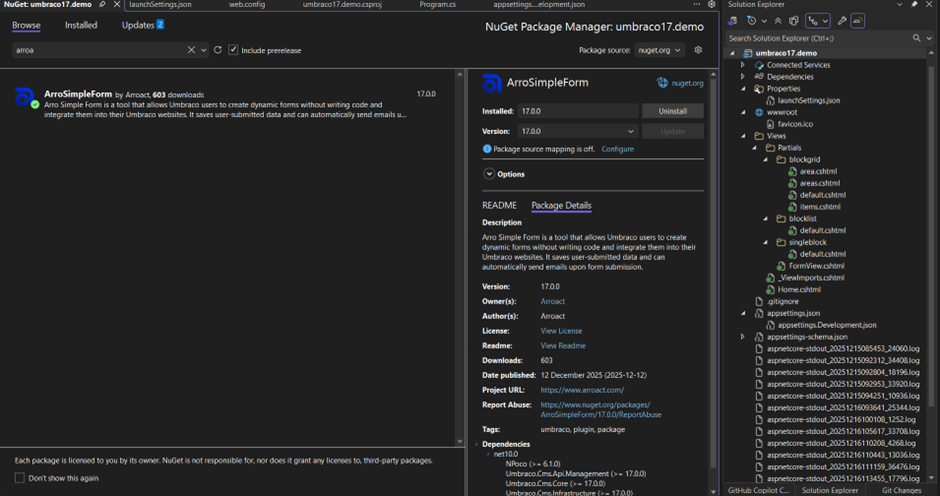
You can also check NuGet link for install package into your project Arro Simple Form
Install package according your Umbraco version package available 13,14,15,16 and 17 please check and install.
Once you install package build your project and run website after successfully up and running your website go to Umbraco BackOffice like https:///Umbraco login with your admin credential
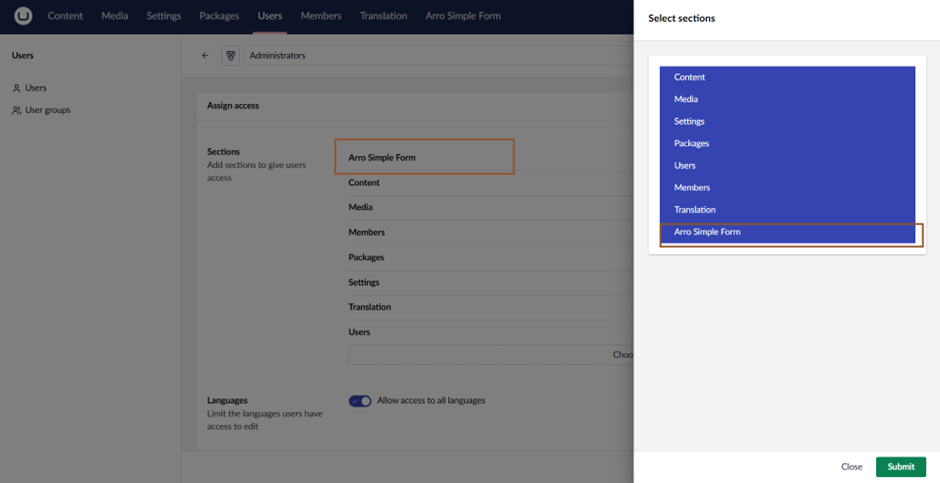
First time Arro Simple Form not going to show in menu for that you need to add section into admin user group for that go to Backoffice >> User >> User Groups >> Administrators
You can show one Sections tab you have one button Choose button click on that one select sections slider from right side and you can show Arro Simple Form please select that and submit and save changes

Once you save changes you need to refresh or restart your application to show Arro Simple Form section in menu
Now your form is ready to use for creating form.
Step 2 Create Form into Arro Simple Form
For create form go to Arro Simple Form section first you can show dashboard which display overview of all form and form collations
Click on Total Forms or Forms tab

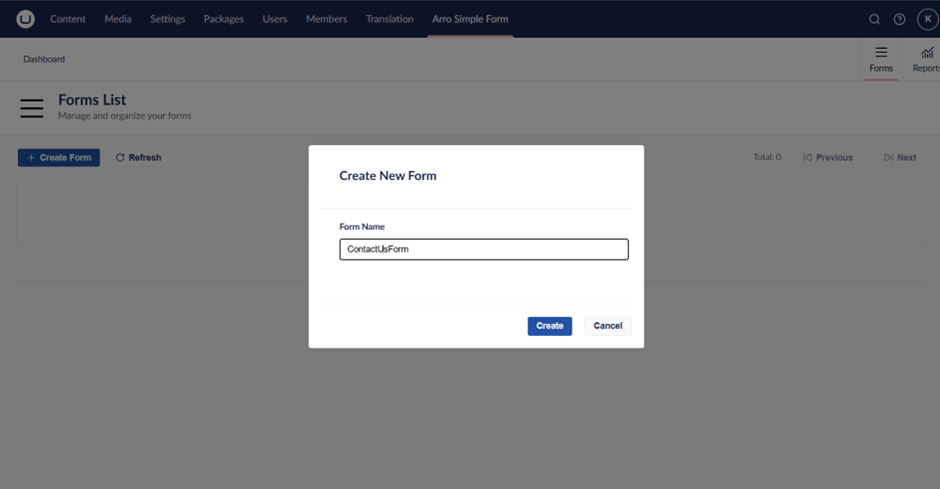
Once you click on button you can show Forms List page on top of this list you can find one button for create form click that button for create new form.

On click create form it will asked you about form name which you need to create give proper name of form once you give name it’s automatically open form build view.
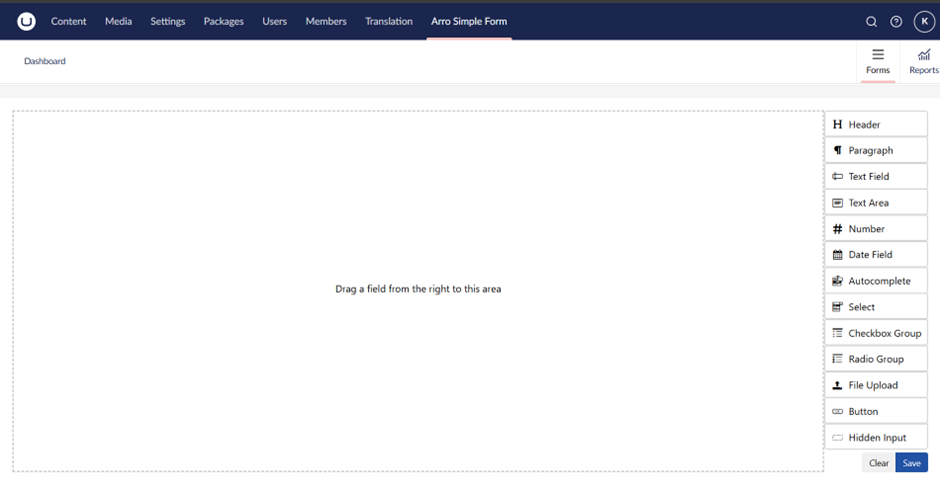
Form builder view look like below image in which you can find two panel drop field panel who can hold you all field which are going to show in your form in real time and left inputs panel have all inputs you can select inputs according to your form requirement like text field, text area once you select field you can also customize that field as well like you can manage css validation and further input type like text field have email, password, color type you can select as per your need and name.
Field Edit view look like below
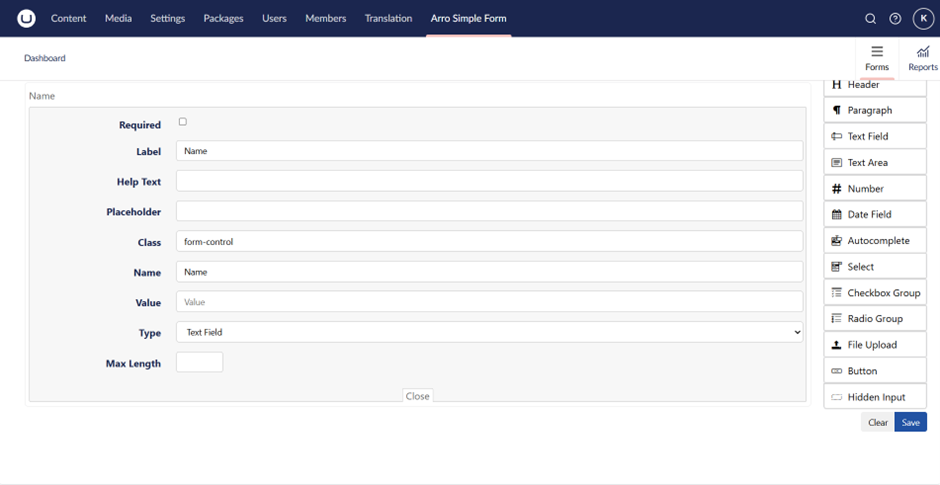
NOTE: Please give Name properly this name going to display into your collection data as well as email
Drag and drop input which you want into your form once all done last step to connect this form with email or collation database for this you need to take button from left panel and edit that button property.
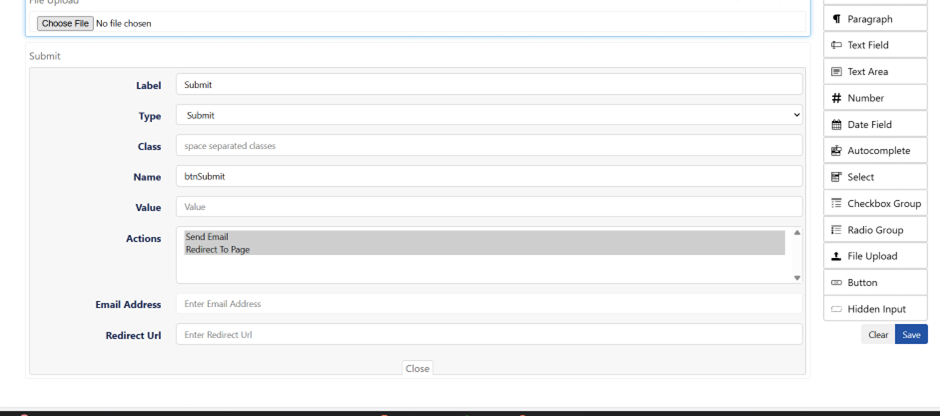
Button Property need to fill
- Label
Name of your button like Submit or Ok or any other label you want to show in button
- Type
it must submit other than submit type form is not going to work make sure you select submit type
- Actions
by default button bind with collation so form data default save in collation and show into Umbraco Backoffice but Actions provide you additional function like below
- Send Email
- Redirect Url
Now all done click on save button for save all your changes once you save changes it’s redirect to your Form List page and you can show your form into list.
At any point of time, you can edit any form clicking on edit button available in list for edit your form this show you that particular form in edit mode and you can edit and save change.
Now our form created successfully let use this form into home page.
Step 3: Use newly created form into page
For display this form in any page you need to go to Settings >> Templates >> select template in which you need to use this form click on insert function of Umbraco (available in right side of page) >> select Partial view
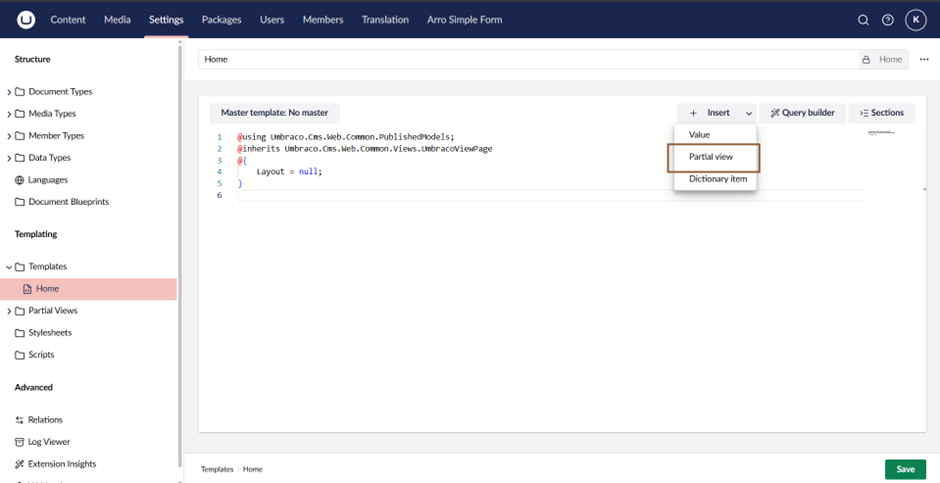
It will open one slide for choose select FormView.cshtml it will add code in your template @await Html.PartialAsync("FormView")
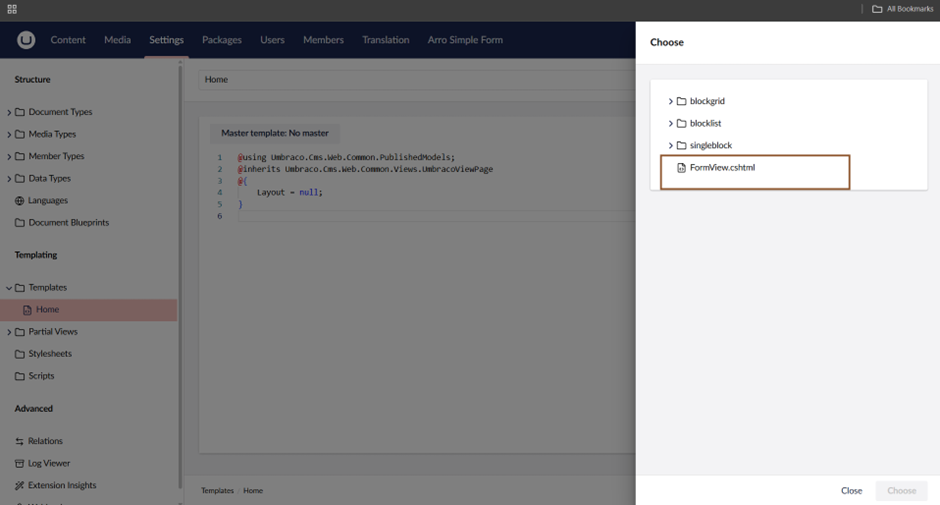
Now form view set successfully next you need to give form name for render your form for that in PartialAsync rendering you need to give second value as form name as value like below. @await Html.PartialAsync("FormView","ContactUsForm")
In my case I have created form name of “ContactUsFrom” give same name of your form which is available in your form list or copy name from list and paste in rendering.
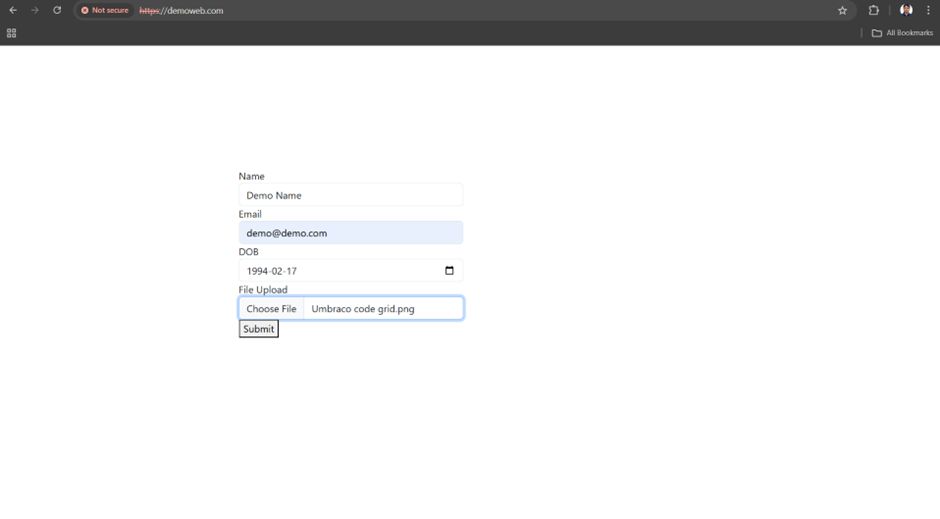
Now all done go to your page and you can find form rendering successfully into your page front side
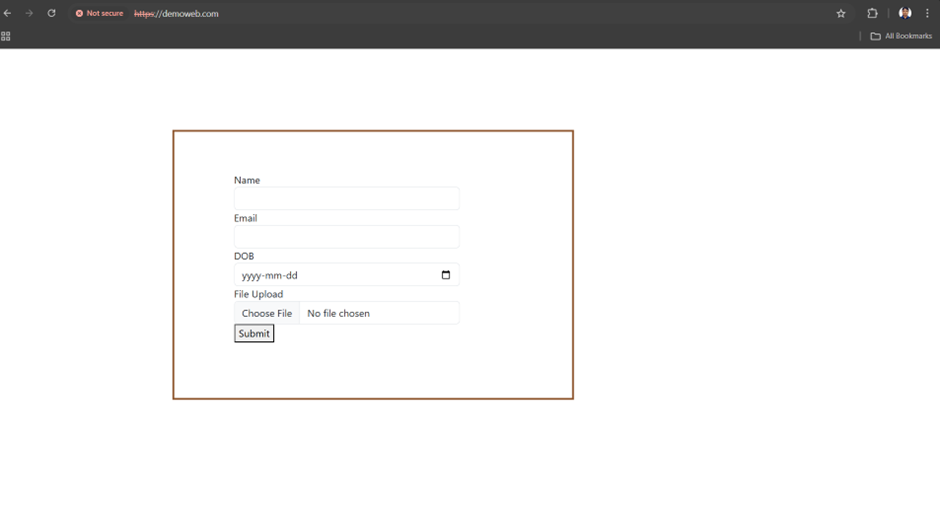
Fill all form with file as below and submit form it will automatically save all information into collation
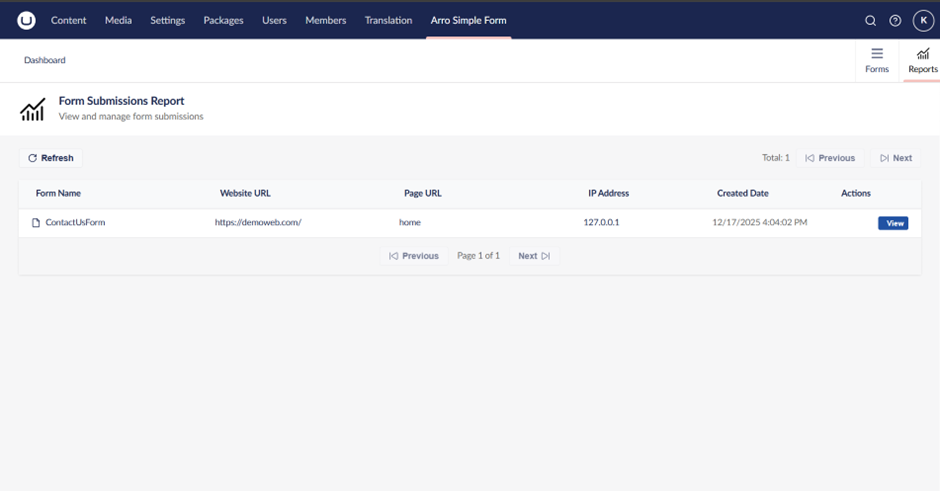
For check all form collation go to Umbraco Backoffice >> Arro Simple Form >> Reports you can find list of all collation of form submitted from client or user side this list shows you website URL, Page URL, IP and Created Date so if your Umbraco have more than one website you can track all that from website URL and page URL.
That’s it this is all about Arro Simple Form Created by Arroact Technologies you can use this form dynamically as rendering time as well just get value of form name from Umbraco page content and convert everything to dynamically check below example of dynamic rendering of template @await Html.PartialAsync("FormView",Model.Value("formName"))
Thank you for reading this blog. If you have any questions or need help with this package, feel free to share your query—I’ll be happy to help.

Related Blogs


Read More

Read More

Read More